
User Tag List
Results 16 to 30 of 46
 7Likes
Thread: nail art i'm trying :)
-
Thu, Apr 25th, 2013, 01:33 AM #16
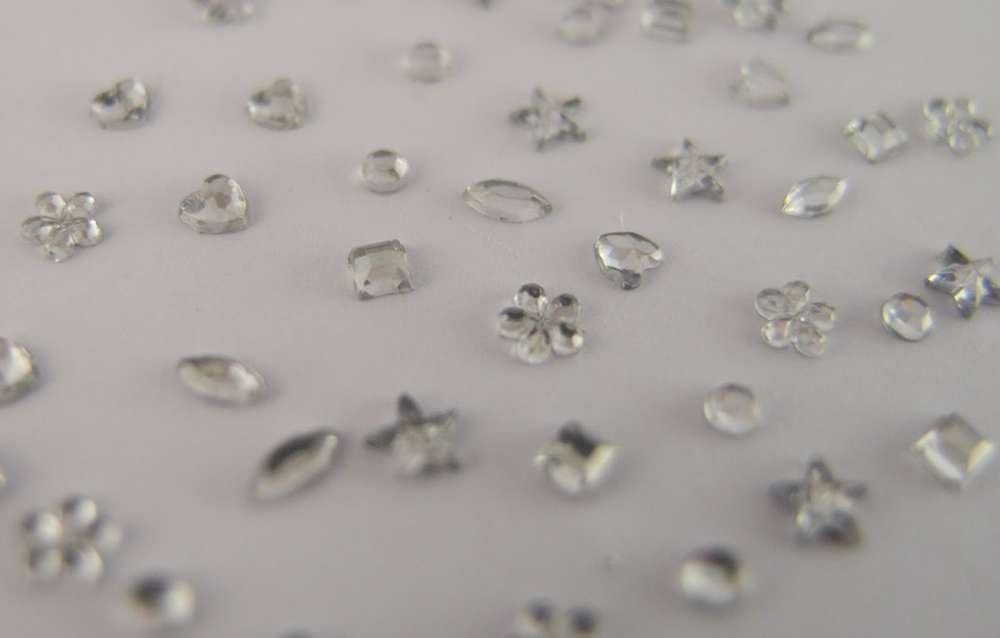
The rhinestones come in a range of shapes: round, square, star, flower,heart and leaf shape all about 2 or 3mm in size.
The product we chose to try out was 6 shapes silver rhinestones.
we decided to use a deep red base for the nails instead of black.
then used the square, heart and leaf shaped rhinestones to create a the same look as on the top in the
picture on the accent nail.
On another nails weI added a few leaves as a half moon effect also adding a round stone on the thumb.
glued them on using Elegant Touch nail glue and topped with a layer of top coat to ensure they stayed on.
This picture be made by Jenny .
ATTACH]174608[/ATTACH]
-
-
Fri, Apr 26th, 2013, 01:59 AM #17
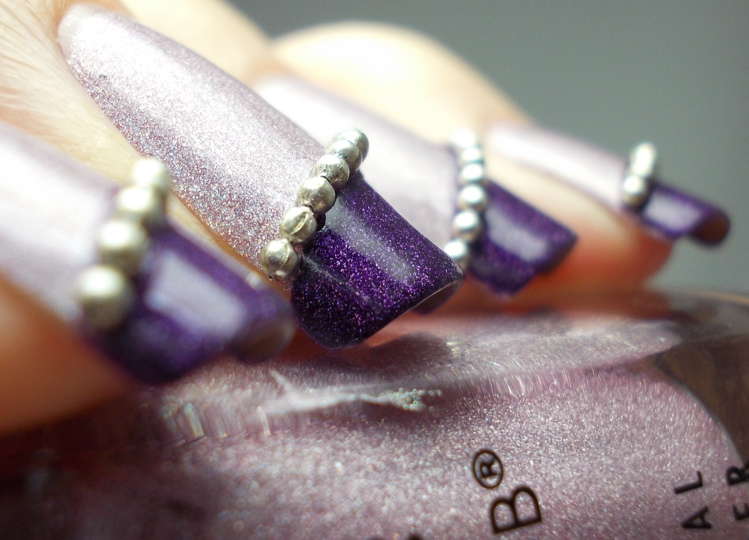
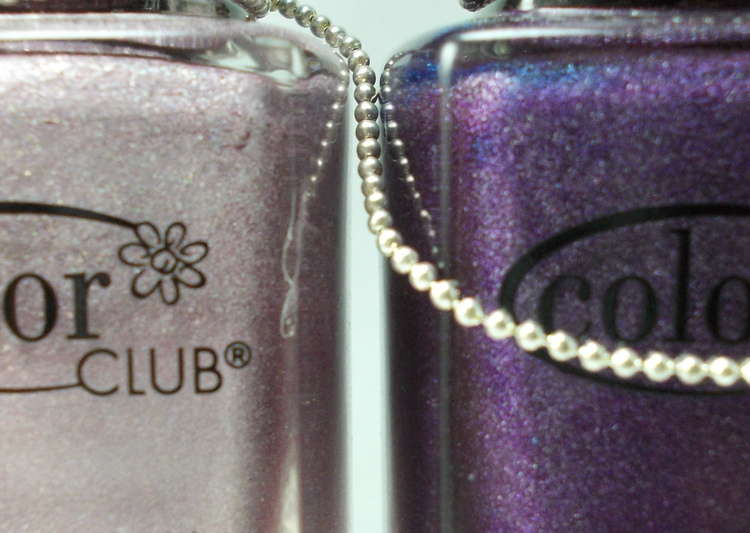
chain of little bead.
this is another kind of nail decorations, very elegant on nail.
after base coat, put a strip tape on nail and apply polish of purple color.
put the chain on tape, (here pls keep in mind, manage to place on nail firmly on your first try)
you can stick with glue if you're worried that the chain may fall off.
This design from Tea ‘s review, very impressive nail tech, she's amazing.
Last edited by NailPretty; Fri, Apr 26th, 2013 at 02:29 AM.
-
Fri, Apr 26th, 2013, 10:19 PM #18
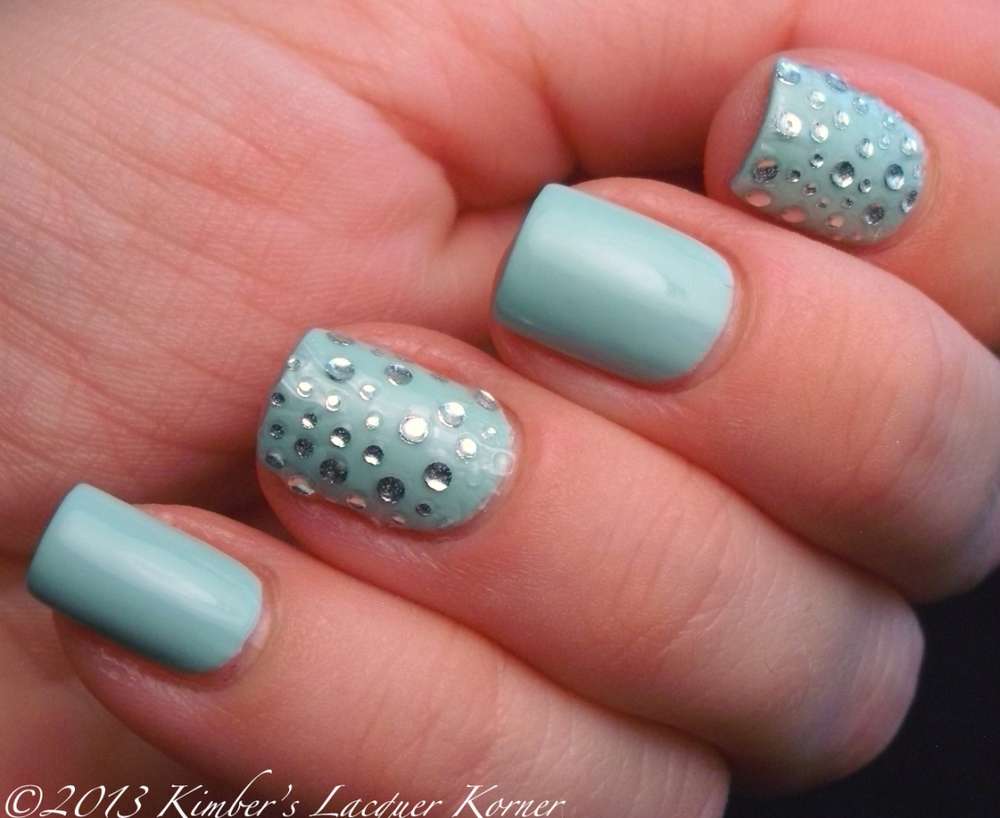
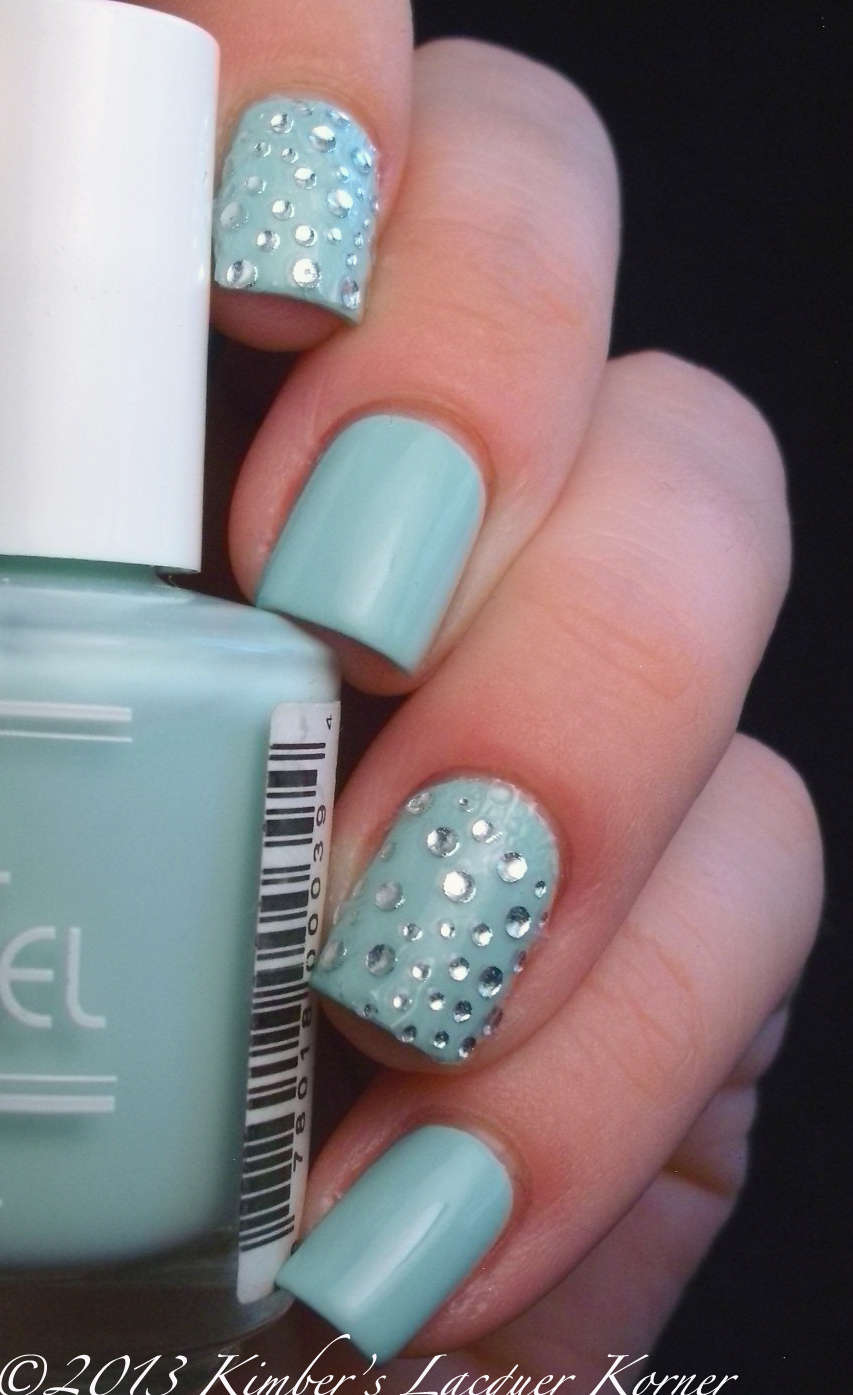
Crystal rhinestones.
They're different sized clear rhinestones set in a clear Applique.
They immediately reminded us of raindrops.
we chose a gorgeous soft, pastel teal as base color.
really amazed at how easy these are to use! Once we removed the strip from the backing,
I set the strip onto my nail, slid it around until it was aligned,
smoothed it down and removed the excess.
To remove the excess, all we had to do was tug on the free end of the strip,
and the excess just popped right off! No need to mess with filing the edges.
This nail art design from Kimberly ’s review
-
Sat, Apr 27th, 2013, 10:09 PM #19
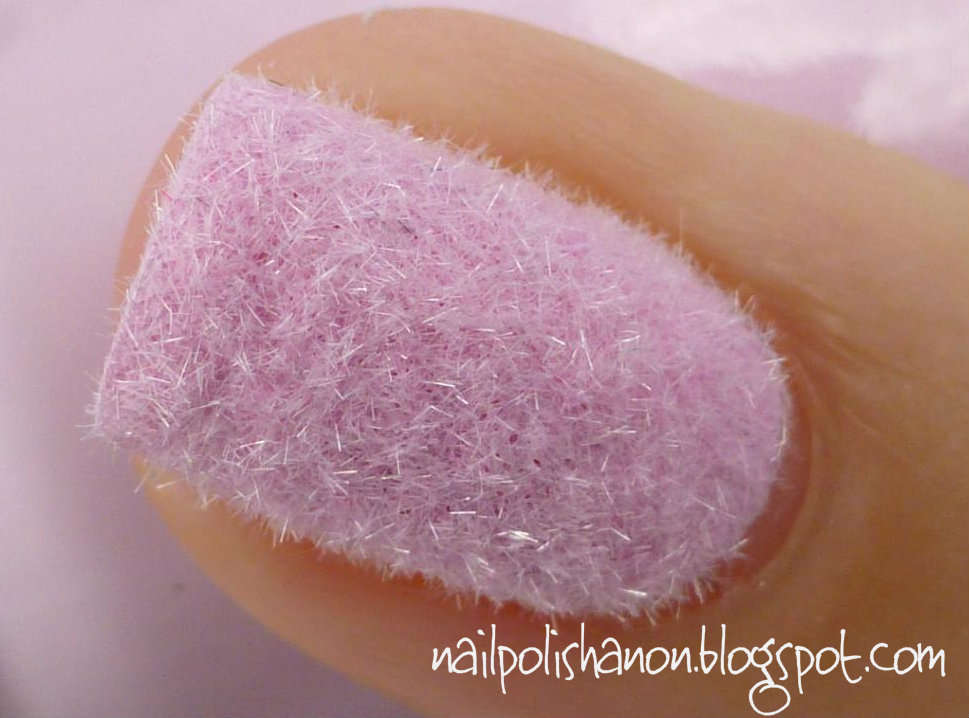
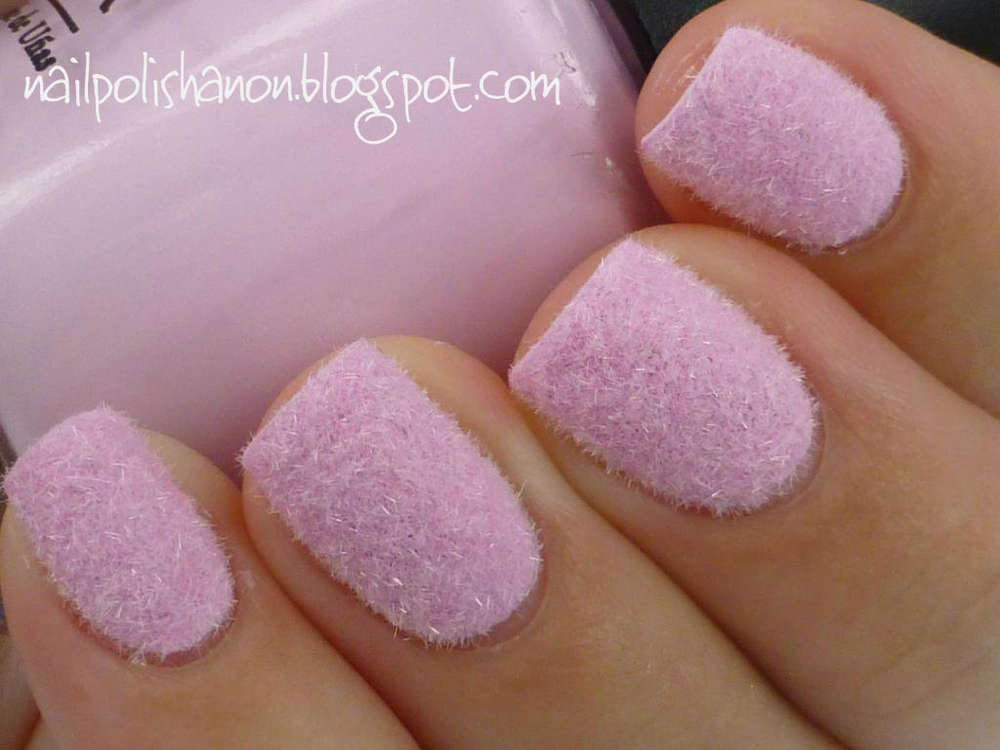
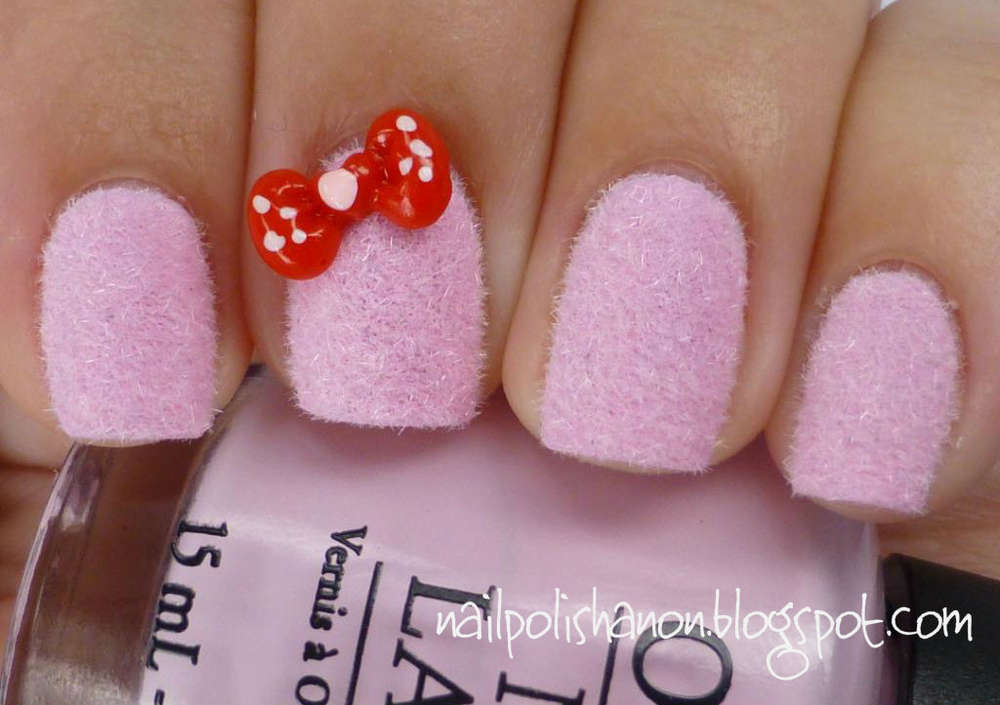
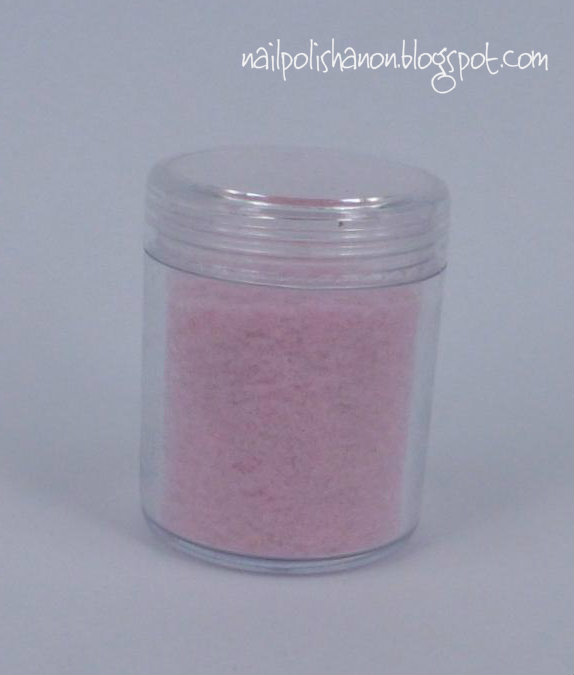
baby pink Velvet Manicure
All you have to do is apply 1 coat of polish, then one by one paint the second of polish on your nail.
Over a paper plate, pour the flocking powder over your nail to completely cover it and gently press the powder
into the polish to help it adhere.
Give your nail a gentle shake off and repeat until all your nails are covered.
After about 10-15 minutes once your nails are fully dry go about your clean-up because the powder hangs
around your hands!
I used my usual acetone/brush removal method around my cuticles, then gently washed
my hands and my nails looked perfect (well once the flocking powder dried they did).
All the excess flocking powder that landed on the paper plate can be returned to the pottle for use next time.
The picture is be made by Michaela.
-
Wed, May 1st, 2013, 11:58 PM #20
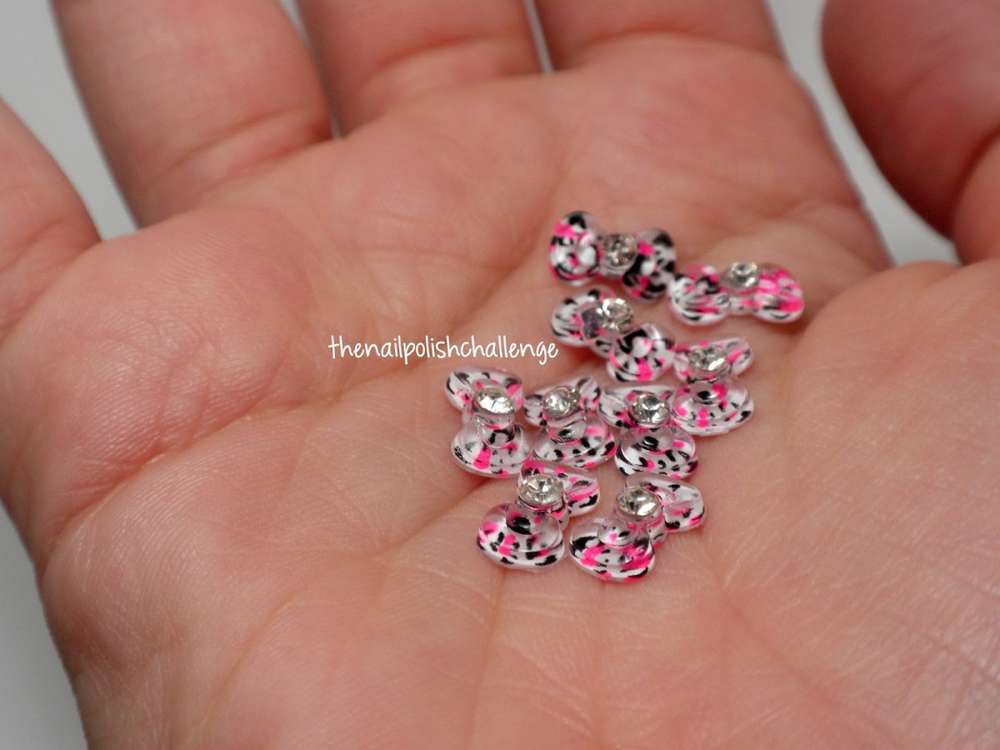
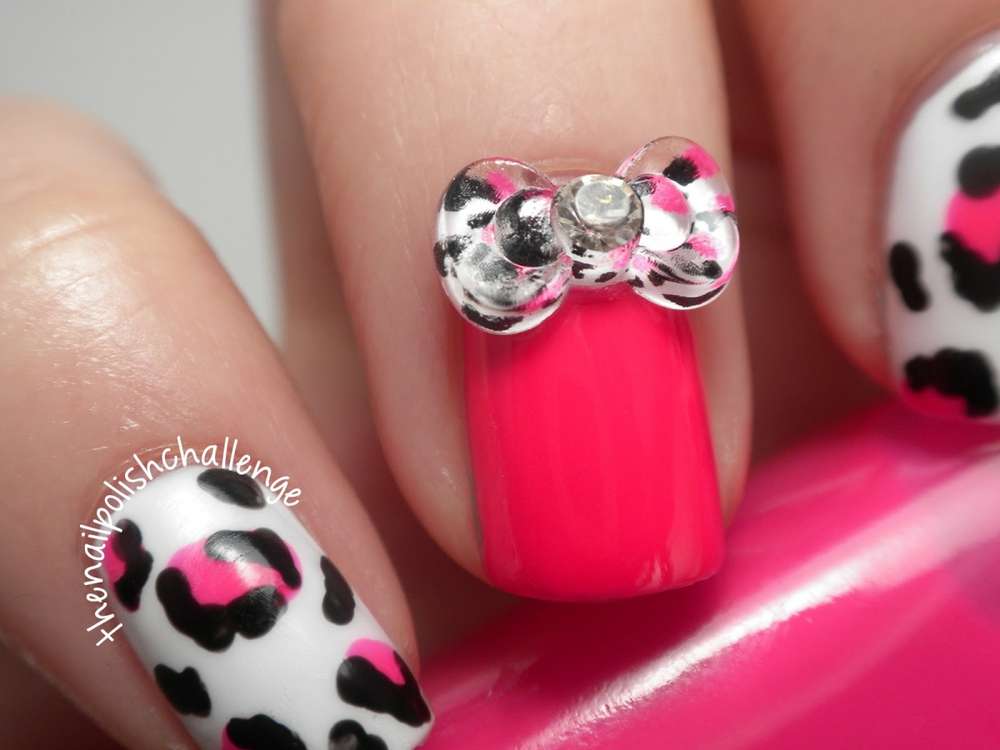
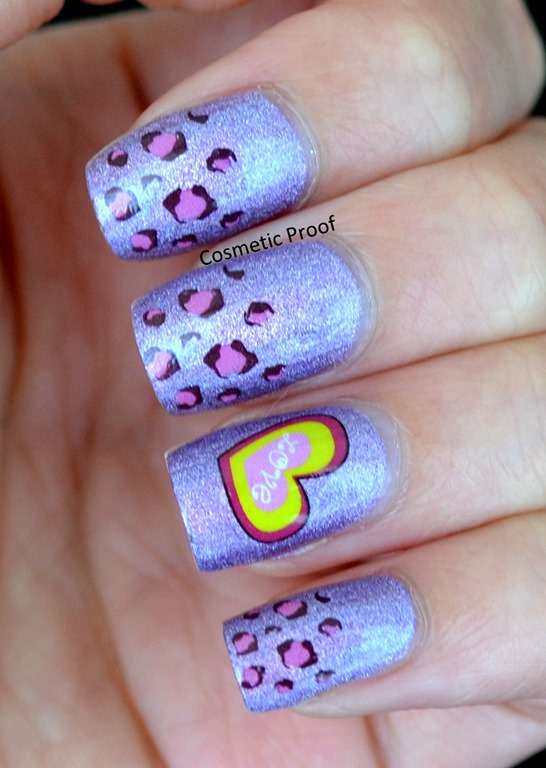
Pink Leopard and Bow Tie Nail Art
For this manicure, dotting pen is used for the detail nail and dots after base coat and nail polish,
then stick the leopard print with Sinful Colors Black on Black.
since it is three coats over white, it looks much more saturated and neon.
This nail art design made by Kelli .
HOW CUTE are these bows?
Last edited by NailNice; Thu, May 2nd, 2013 at 12:09 AM.
-
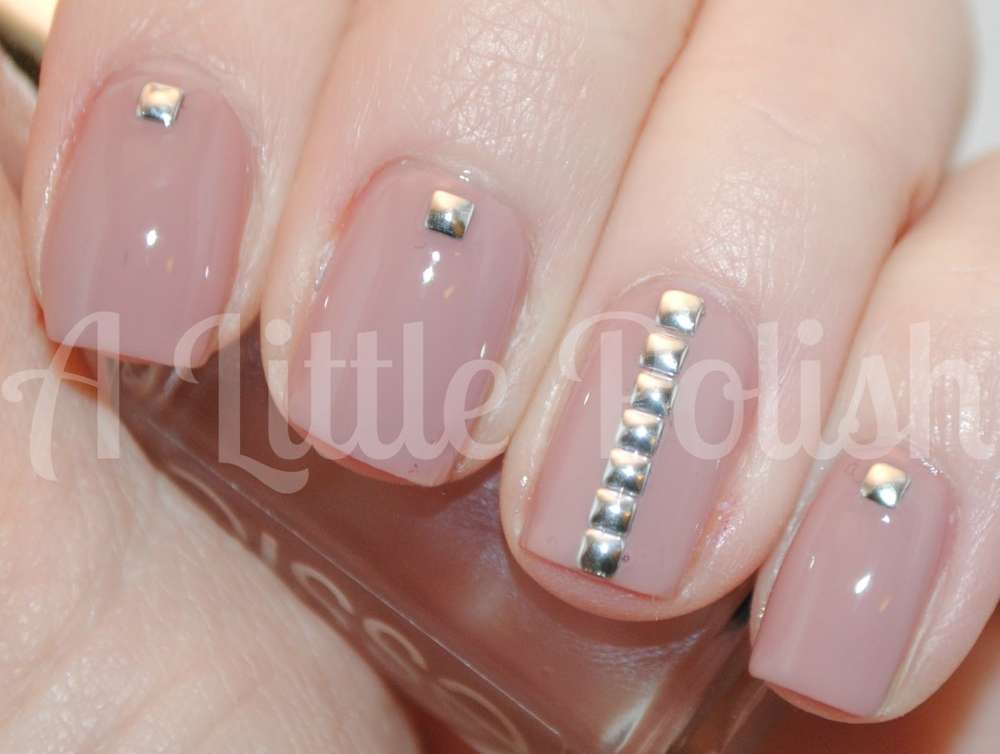
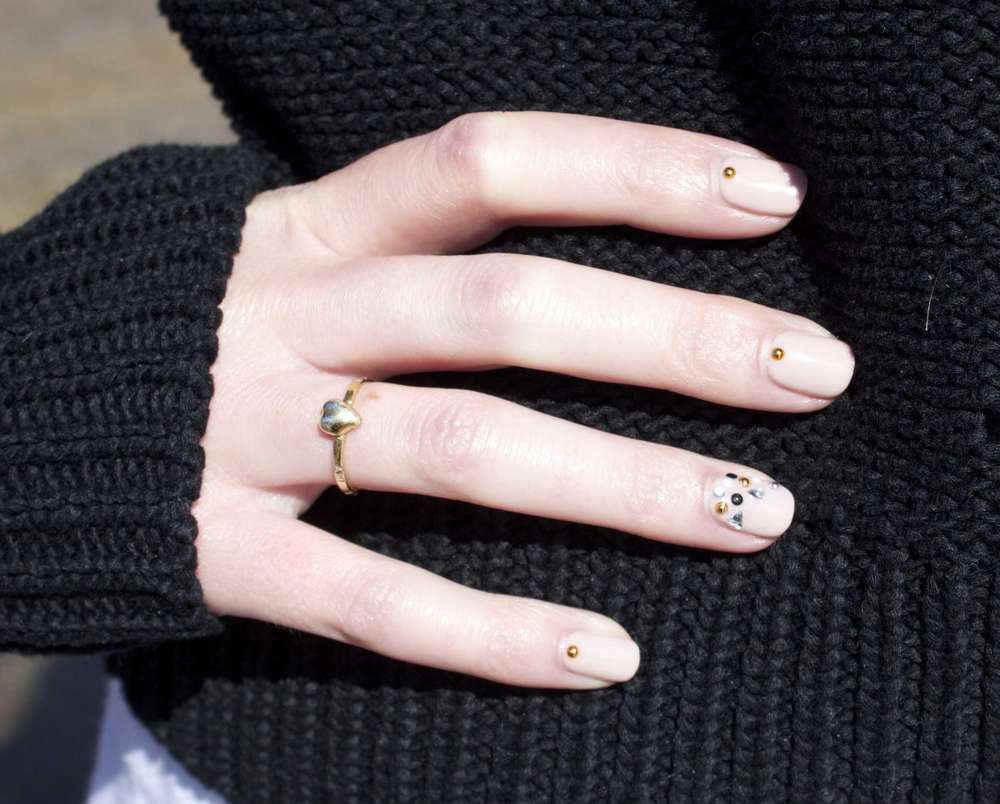
Thu, May 2nd, 2013, 09:59 PM #21
we use a neutral base so that there would be a nice contrast of soft and hard with the studs.
just applied them over top wet polish and coated and it was a surprisingly smooth finish.
touching them but they never even loosed up, which is great!
The studs also stayed on all day at work with lots of typing.
This picture is be made by Stephanie.
Last edited by NailNice; Thu, May 2nd, 2013 at 10:02 PM.
-
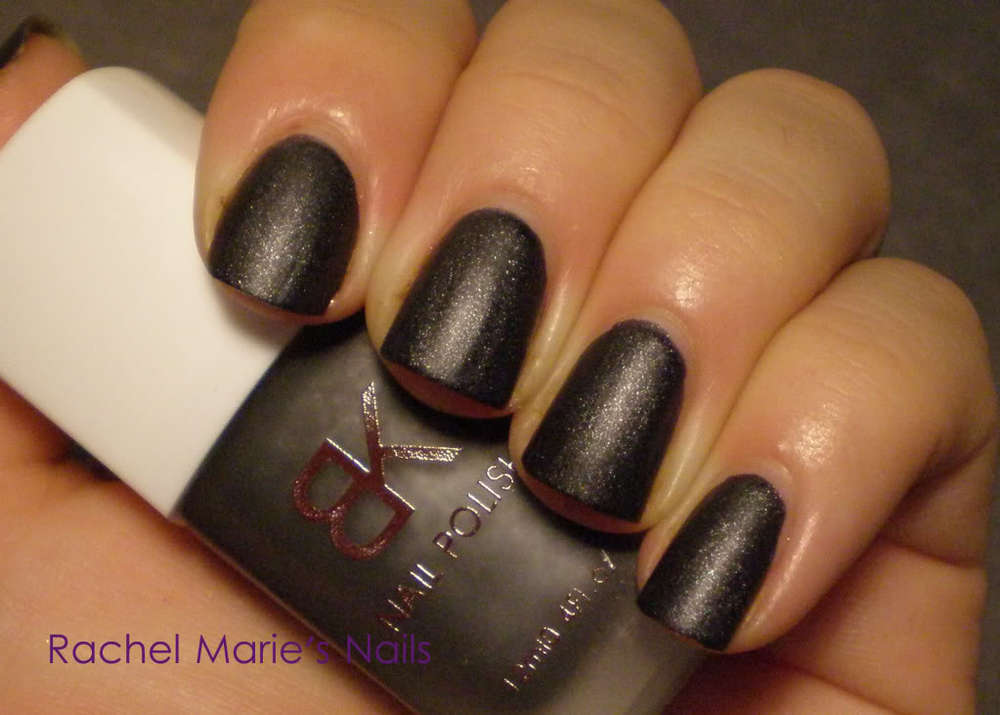
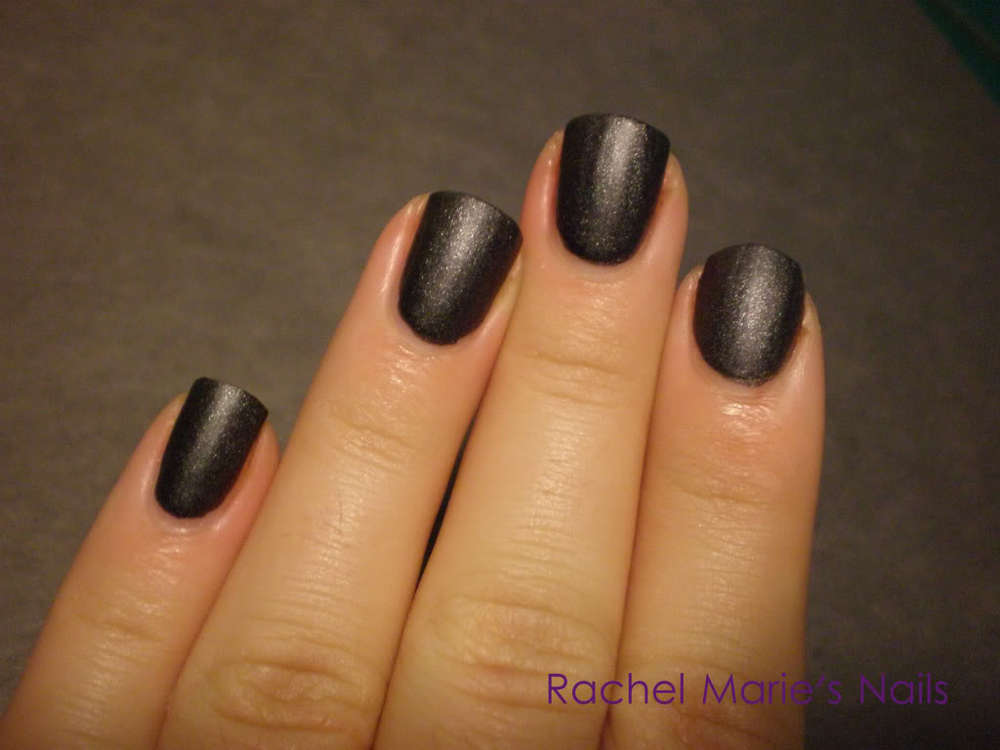
Fri, May 3rd, 2013, 10:23 PM #22
This is BK Smoky Grey Black. This polish is a black matte polish with silver shimmer.
I love shimmery black mattes like this. It makes a great base for glitters.
This polish went on smoothly and was opaque.
we then added a coat of Eternal Neo Crystal. Neo Crystal is a shimmery hex glitter in a milky base that I used to accent Smoky Grey.
this is made by Rachel Marie
-
Sat, May 4th, 2013, 07:25 AM #23
Wow I must be dreaming!!!!

-
Sun, May 5th, 2013, 10:30 PM #24wow, you like nail art , too. you will meet many impressive nail art once you learn about that. :D
 Originally Posted by vesper

Last edited by NailNice; Sun, May 5th, 2013 at 10:32 PM.
-
Sun, May 5th, 2013, 10:45 PM #25
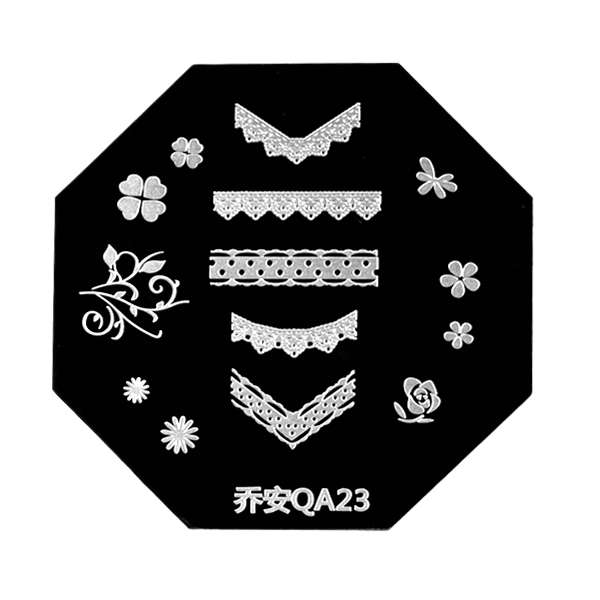
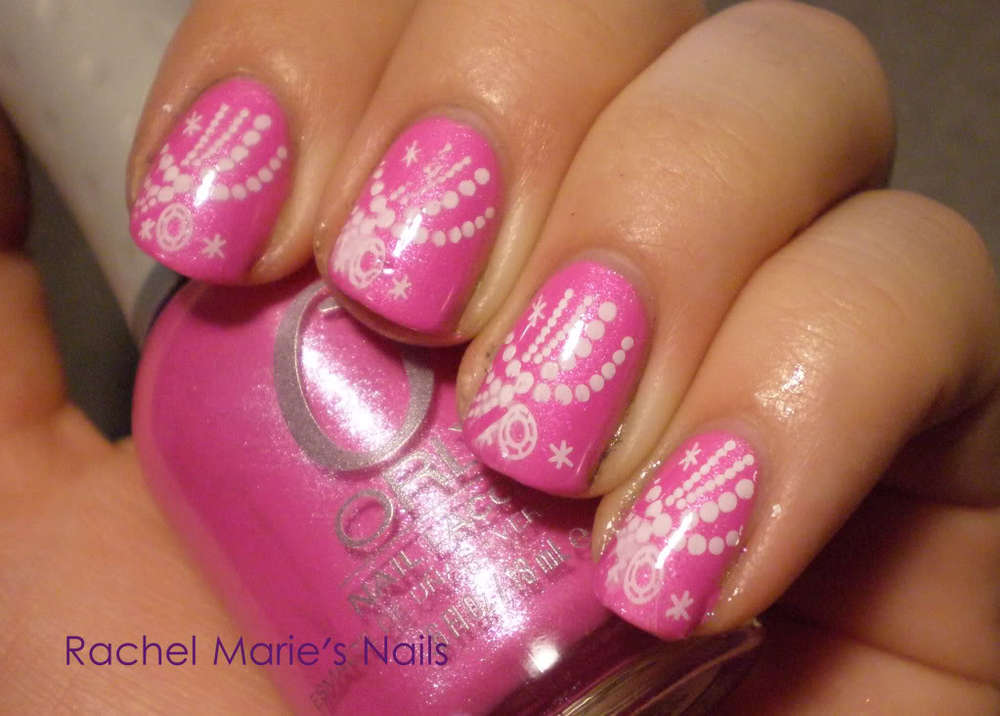
nail art stamping
1. Apply base coat or regular polish on the nail.
2. Apply the nail polish to desired image within a plate. (Recommended: Use the Solid Color Nail Polish, so that the texture will be thicker than other nail polish)
3. Make a scraper leaned over 45 degrees and scrape excessive polish off quickly and strongly from inside to outside.
4. Immediately press the stamper with a gentle rolling motion to pick up the design. The image is transferred on the stamp.
5. Stamp the image on your nail with a gentle rolling motion. The image is transferred on your nail.
6. Repeat the above steps for all of your nails.
7. After stamping nail art, apply top coat for lasting wear.
we started out with 2 coats of Orly Flirty.this would make a good background for stamping.
we did try out the 1 sided stamper and had no problems with it.
It was actually easier to position the designs.
we did not use the scraper because it is metal and I usually use a gift card cut in half.
the design is made by Rachel Marie.
Last edited by NailNice; Mon, May 6th, 2013 at 11:14 PM.
-
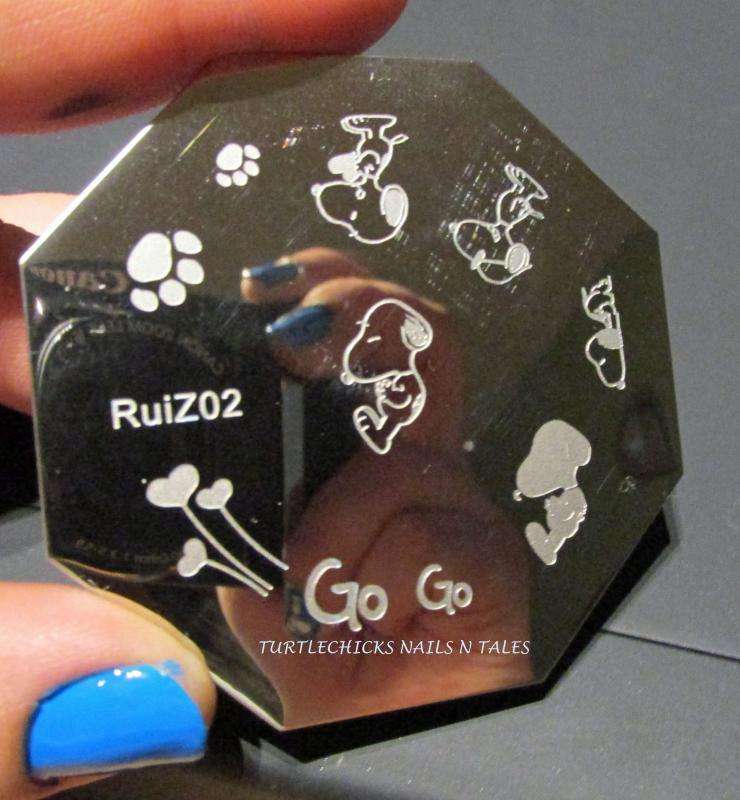
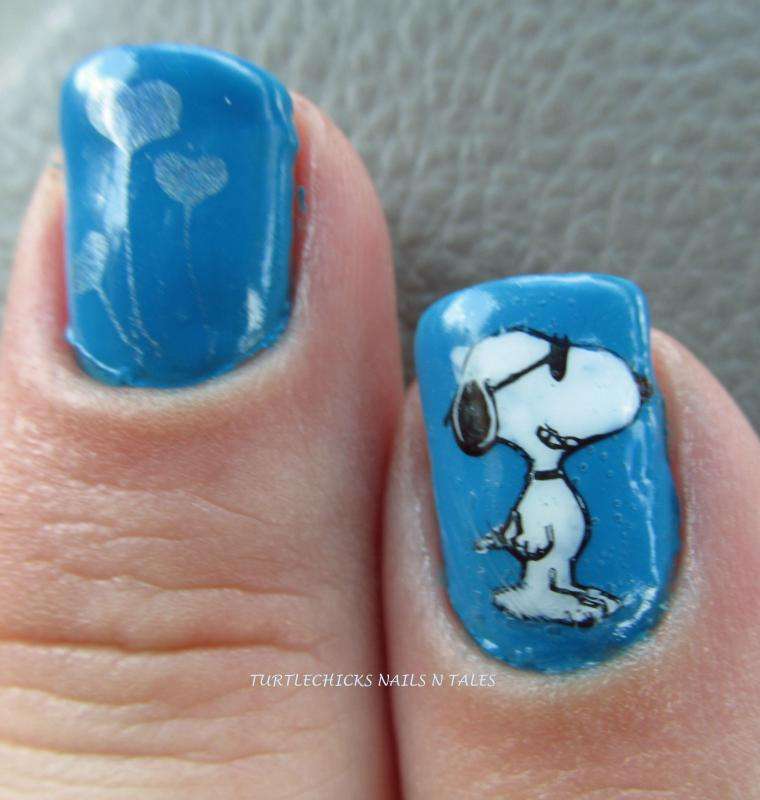
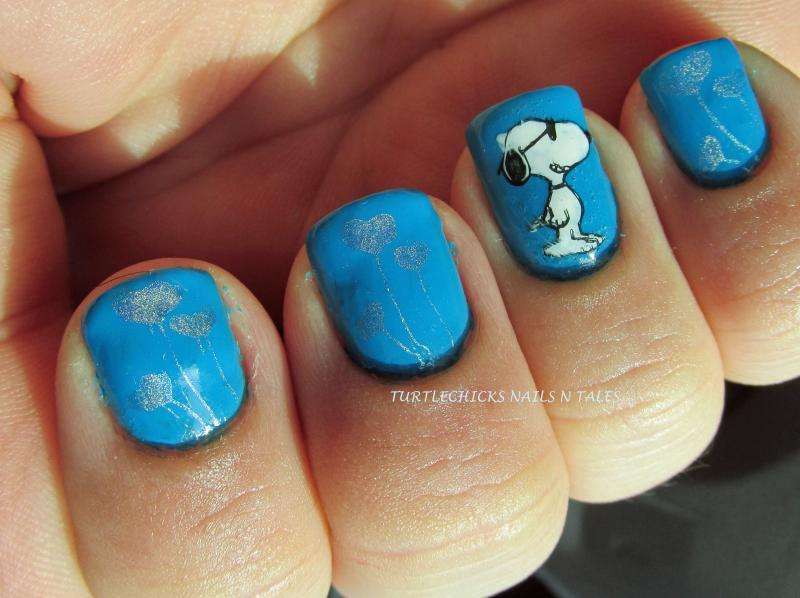
Mon, May 6th, 2013, 11:10 PM #26
stamping plate.
today we'd like to introduce another nail art kit, stamping plate, a plate to make pics on nails polish,
usually containing many pics as hello kitty, bow-knot, flower, ballon,etc.
we use plate RuiZ02 from BPS。
we all LOVE Snoopy and have been dying to get this plate for a LONG time.
we stamped those hearts on sticks design with Sci-Fly By.
I don't know if they are supposed to be balloons or flowers or just hearts with stems but they
were cute so I used them.
I did the Snoopy with Sunglasses design but instead of stamping directly
I used the stamper decal method.
A close up of the Snoopy decal shows a ton of bubbles caused by the top coat.
so that remind us to read the directions again before doing the decals.
the design is made by Julie.
-
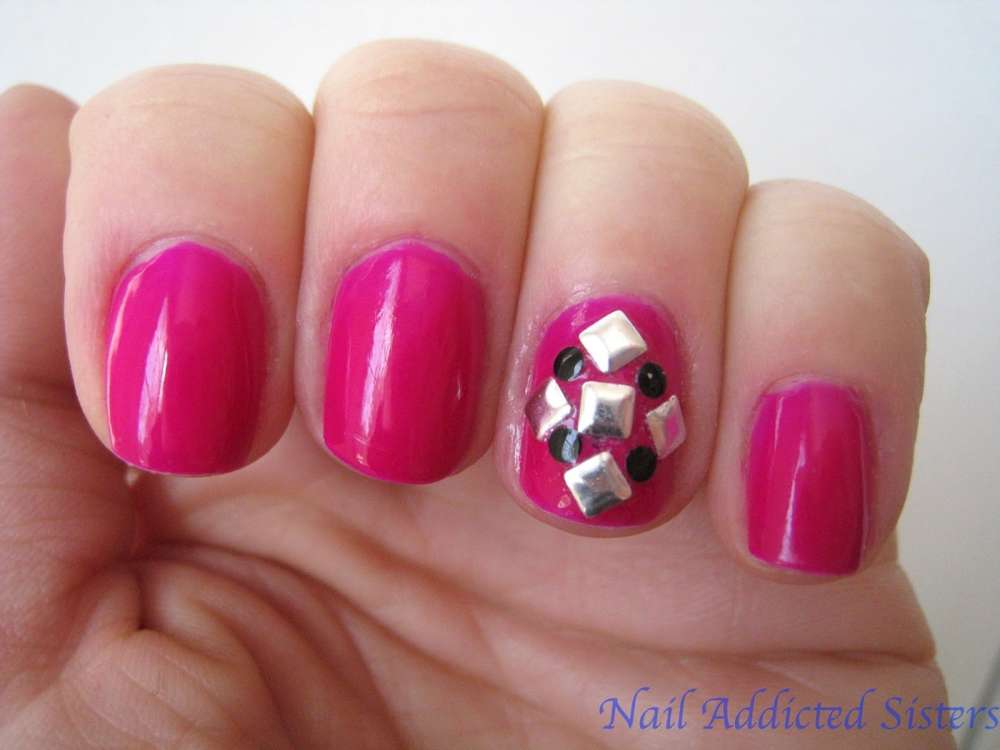
Tue, May 7th, 2013, 11:34 PM #27
round stud
this is another stud, usually round in shape, many colors as siliver, blue, black(this is very common), orange,yellow, etc.
diameter is usually 2mm or 1mm.
please keep in mind that don't apply too much stud on nails, one or two is perfect decoration.
we worked in a sort of stud shield using silver squares and black circles.
The thing people don't like about using studs is that they rarely stay on for more than a day or
two before they start to pop off one by one.
so we need to use a bit of nail glue next time for maximum adhesion!
the design is made by Erika Victoria.
the nail polish color and design of nail art is for your reference.
-
Thu, May 9th, 2013, 01:06 AM #28
the water decals.
this is anothe nail art for your choice if you don't like nail polish or lack of nail art tech support.
very easy to use but stunning effect on nails.
Nails Application:
1. Trim, clean and polish the fingernails; paint the background coior on the fingernails and dry it out.
2. Remove the film of product,cut out the patter and plunge it into water 10-20 seconds.
3. Moisten the fingernails, stick the patter in position.
4. Sop up the water with a paper towel and blow dry.
5. Cap with clear nail polish and blow dry.
This nail art design made by Christa S.

-
Fri, May 10th, 2013, 03:36 AM #29
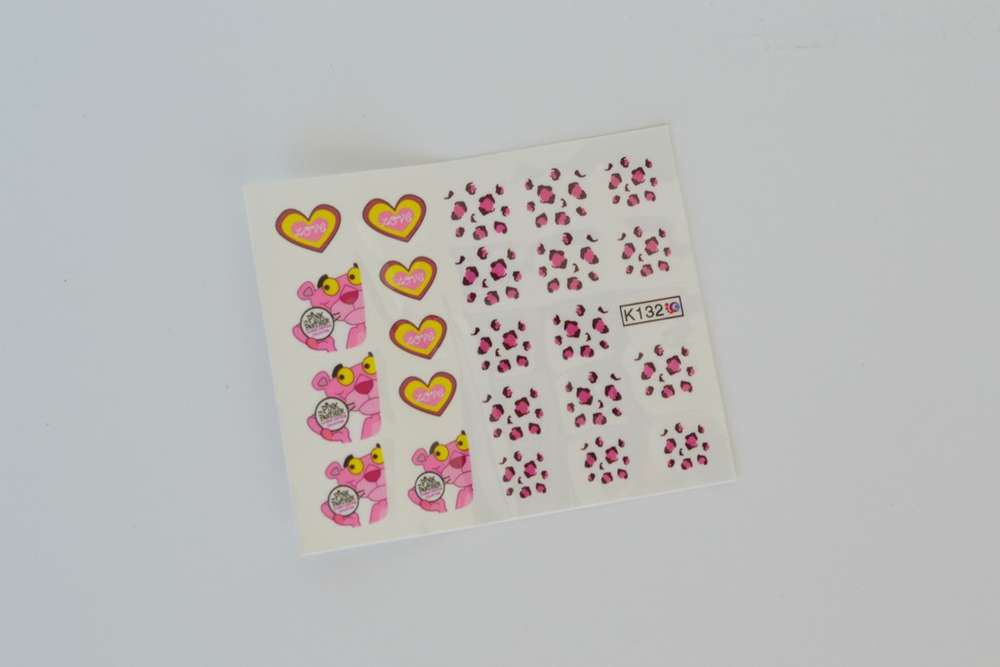
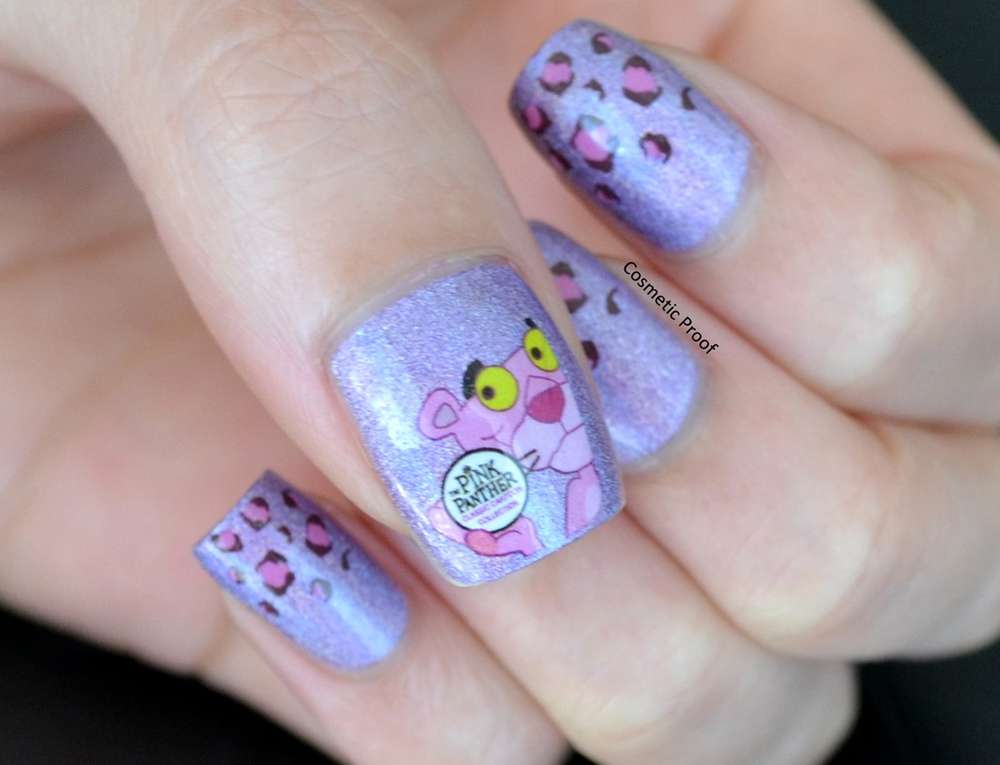
Pink Panther Water Nail Decals
There are enough decals to either have a full leopard print manicure on both hands
to mix and match.
A holo always needs a few pictures with flash!
having a holo nail polish was actually quite fitting for the Pink Panther theme!
They were so incredibly easy to use
you just need to peel them off the paper with tweezers.
Make sure your nail is also wet so that there is a layer of water between your nail and the decal as
it allows you to easily position the decal without having it stick to the nail.
If there is any slight creasing,it disappears right away once you blow dry the decals for a few seconds and then apply top coat.
the design is made by Jayne
-
Mon, May 13th, 2013, 10:52 PM #30
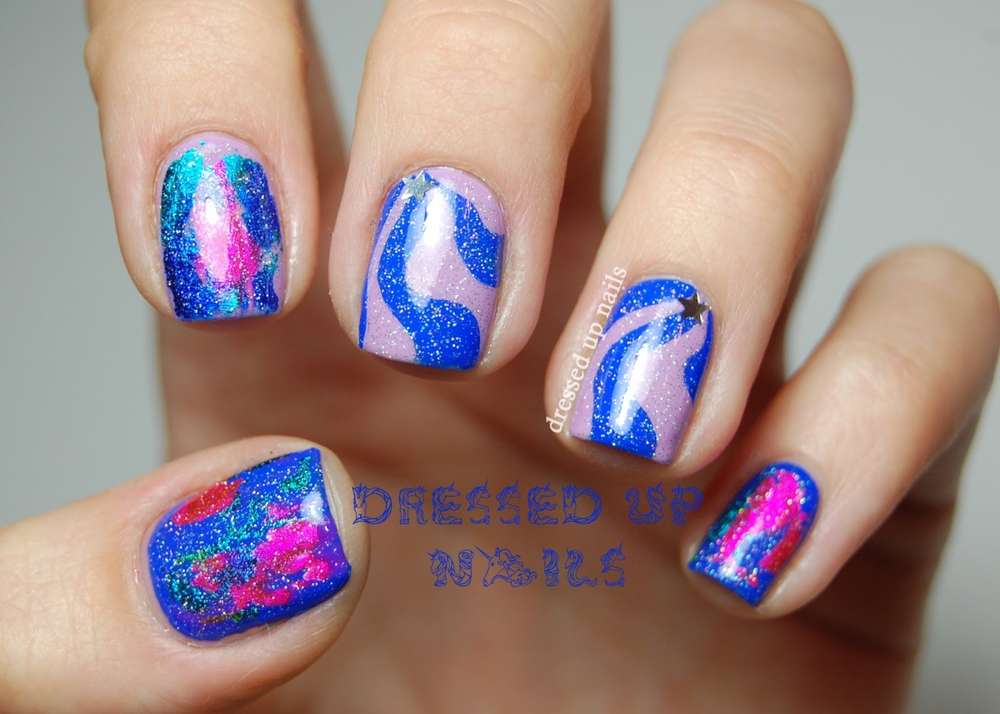
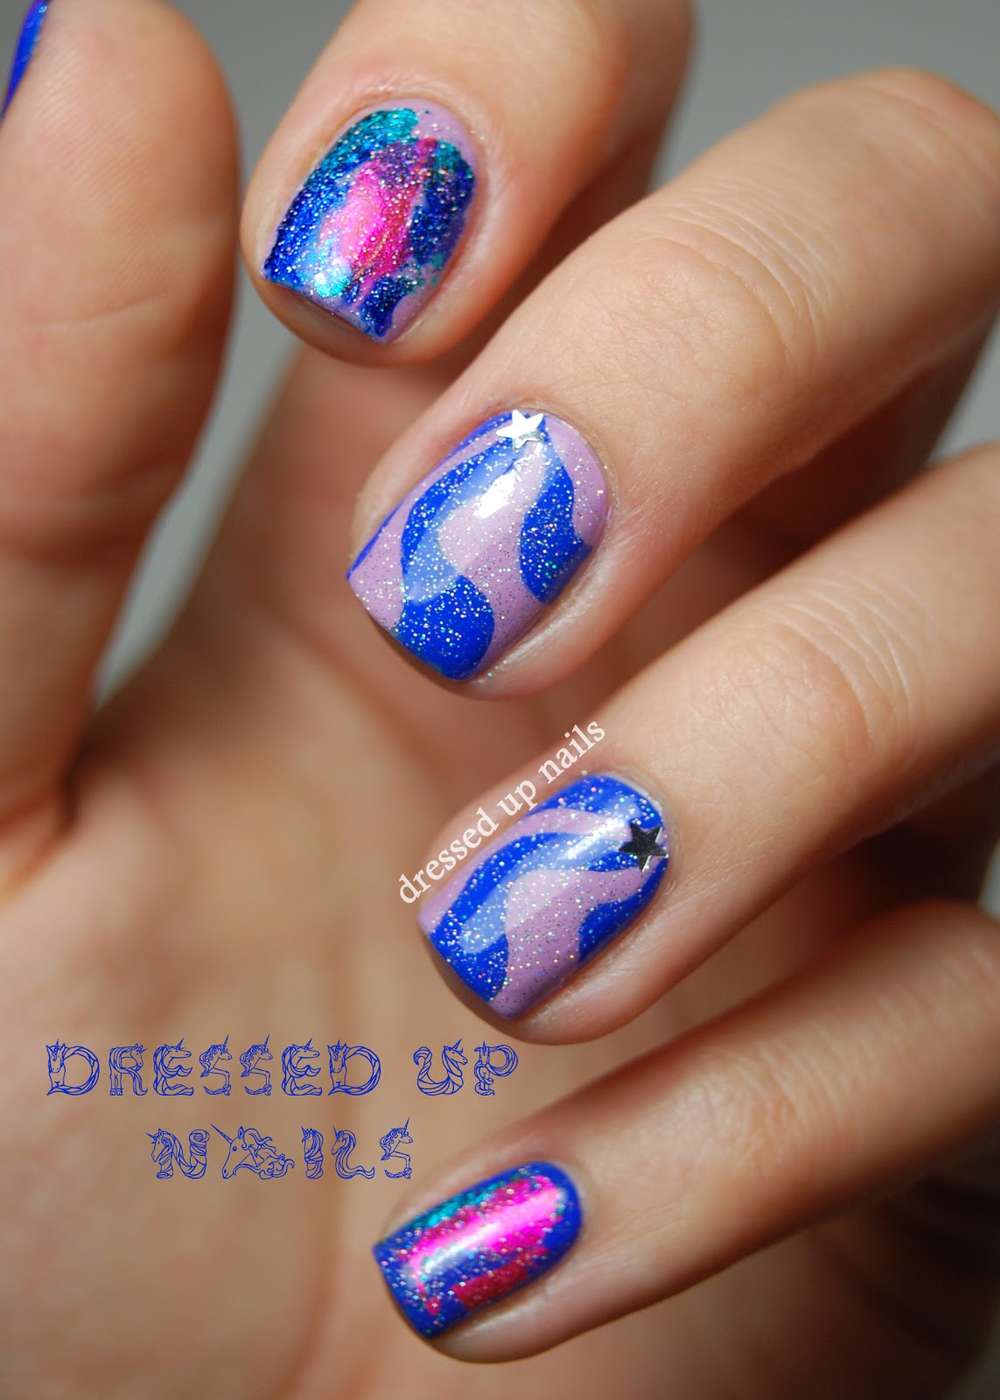
nail foil stickers.
The strips were a little unwieldy so we cut them into little squares and stuffed them back in the container after
using them.
After my second coat of polish was almost dry but still a little tacky,
we took all four colors of my nail foils and pressed them randomly on each nail.
On the two middle accent nails we used a striper brush to freehand the swirls and
then attached loose star glitter, also from BPS, to the center of each swirl set.
love how the stars make the swirls look more finished... definitely can't wait to use these more!
the design is made by Whitney


 Send PM


Thread Information
Users Browsing this Thread
There are currently 1 users browsing this thread. (0 members and 1 guests)
