
User Tag List
Results 1 to 9 of 9
 6Likes

Thread: Simple Homemade Wood Stain
-
Mon, Jun 17th, 2013, 07:59 PM #1Senior Canuck


- Join Date
- Nov 2009
- Location
- WINNIPEG
- Posts
- 846
- Likes Received
- 502
- Trading Score
- 2 (100%)


3
EDIT* UPDATE*
Well I didn't believe it when I read it.
Wood stain made from vinegar and metal! No way, it couldn't work, could it?!
Well being the experimenter that I am (and I was also looking more for a home made stain that deters pests LOL) I decided to give this metal and vinegar stain a try, because someone was claiming that you can make blue wood stain at home!Ok a light blue stain but still Also because I had the needed ingrediants at home
(hence homemade I guess)
So I grabbed a couple of old clean pickle jars and rummaged around until I found some pennies and copper wire for good measure. Then some stainless steel wool and nails.
Copper in one and steel in another jar, add in some vinegar, I just filled my jars up. Then left them last night to make.
Well today I decide can't wait until later to try, grab a brush and dipped it in the steel jar. (There really wasn't much change in either water by this time.) and brushed it on a piece of plywood that was laying around. No change to the wood so I figured ok its too early for anything to be happening and walk away. Come back 20 mins or so later and viola said plywood had a STAIN! HOLY WOW! It was a decent stain too.
I have pictures that I will post but want to wait until the staining is done on my projects.
Then I read some more about these stains and someone said that you had to leave the lids off the jars so that oxygen can get in.
The copper water hadn't changed at all but the pennies sure were looking nice and shiny!
Read somemore and watch a youtube video where they showed to add hydrgen peroxide to the copper mix to get more blue and to heat it as well. Well I had already thought to move it out in the sun by this time, and then ran to the corner pharmacy for peroxide. Threw some in the copper mix and within minutes it had a bit of color but not much. Then I went to my Drs appointment, came back and WOW what a blue color.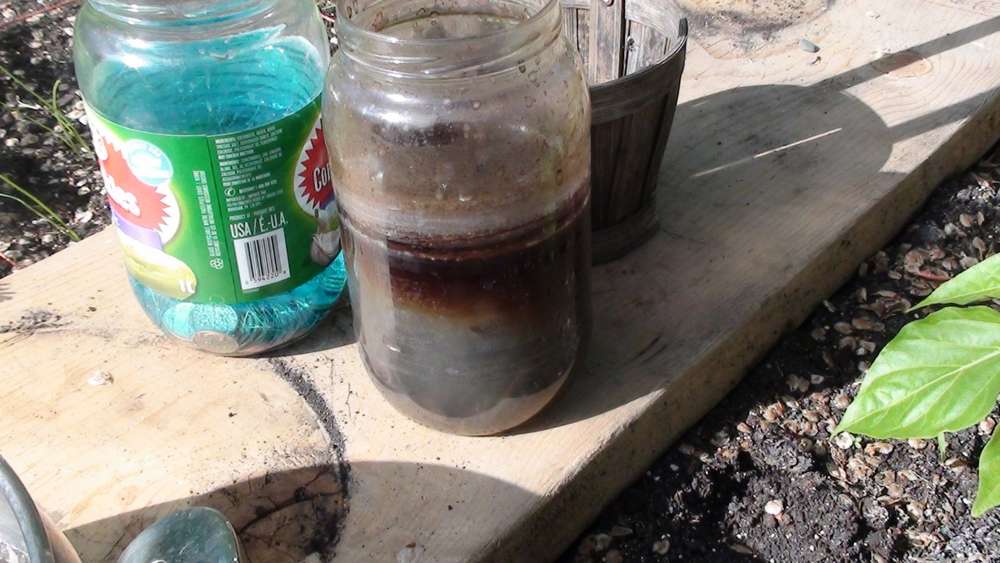 This still doesn't seem to stain too much blue yet, so will let it oxidize a bit more. The steel mix was changing colors a bit then I decided why not drop some peroxide in there too to speed up the process, so drop about 1tbsp or so and instantly the color changed. It was the grey you see on the bottom then changed to the rust color. As you use it it does go back to the greyish color in the jar but still works.
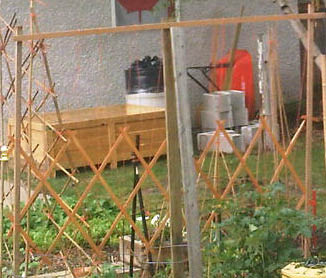 This is the color of the crate before the tea stain and then the steel stain.
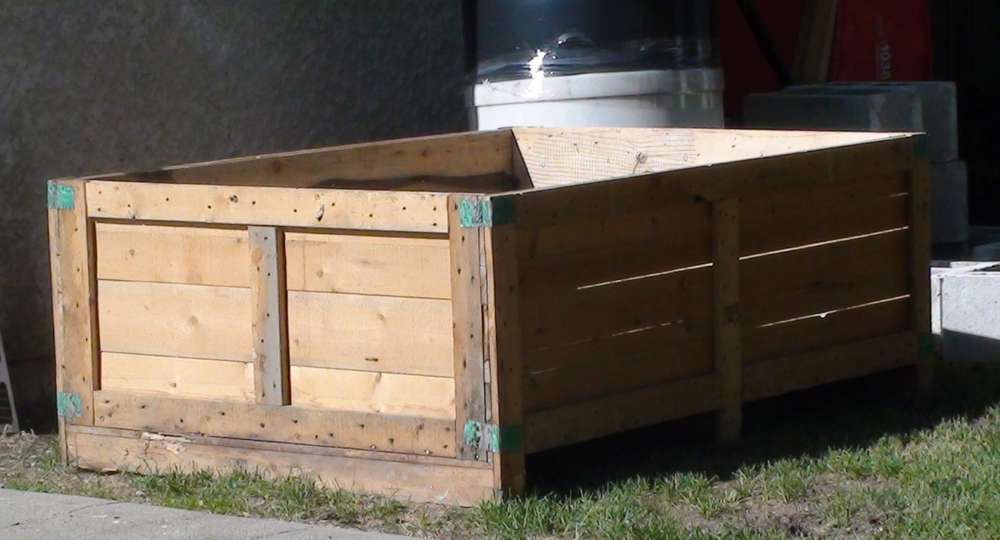
I also made a tea infusion out of what ever teas I had around, black tea is best. I used this on the wood BEFORE using the steel stain to bring out the tannins in the wood, it also does what they call ebonize the wood when you use both stains. First apply the tea stain then the steel stain.
*(Edit: This is the inbetween picture of the crate for the raised bed. It has the tea stain on it now. )
I will post pictures of the inbetween and after I couldn't wait, it made me excited, expecially with the amount of color the stain has after so little time brewing.
So wait and watch for pictures.
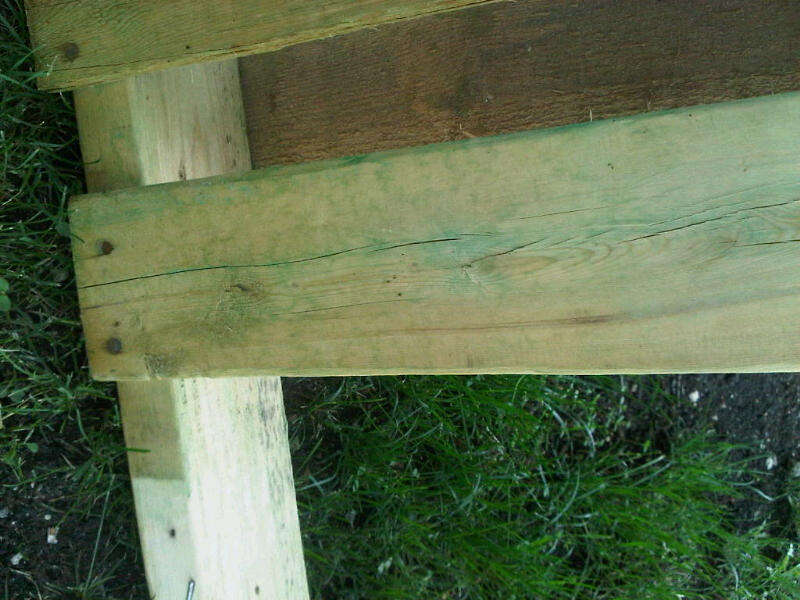
This is the end result (I only put the steel stain on the edges of the crate) and left the middle with just the tea stain. I was a bit sloppy and got some of the steel stain on the middle parts, but still like it, it stains instantly. The darkness is something else. I beleive the crate is made out of pine.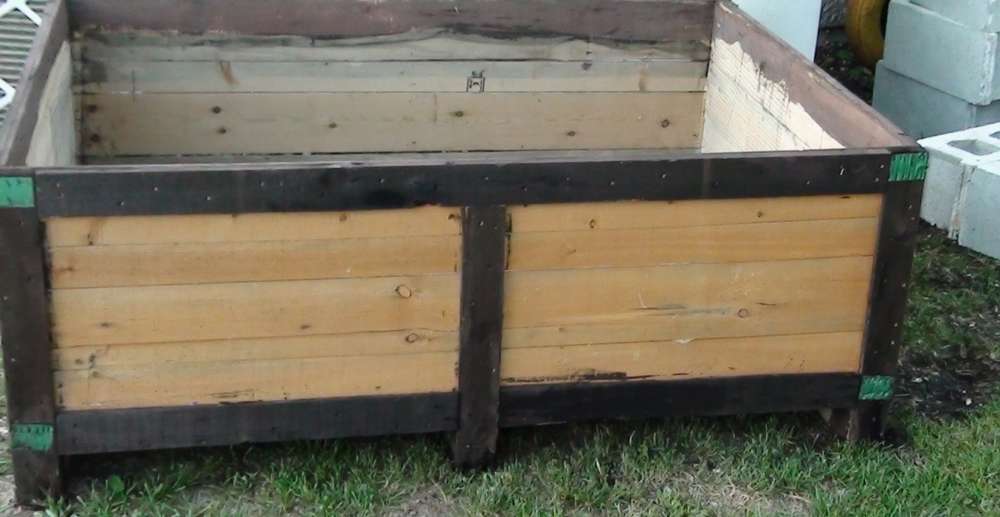
My raised bed recieved the tea stain all over, and some of the steel stain on parts. It needs to be finished, hopefully tommorow. It has a totally different effect than the crate.
I will also post pictures of the blue stain so you can see that turns out on wood. I decided it was best to use it on something small in case it doesn't work out. I decided to do the herb garden I am making out of an old pallet. * UPDATE Pics *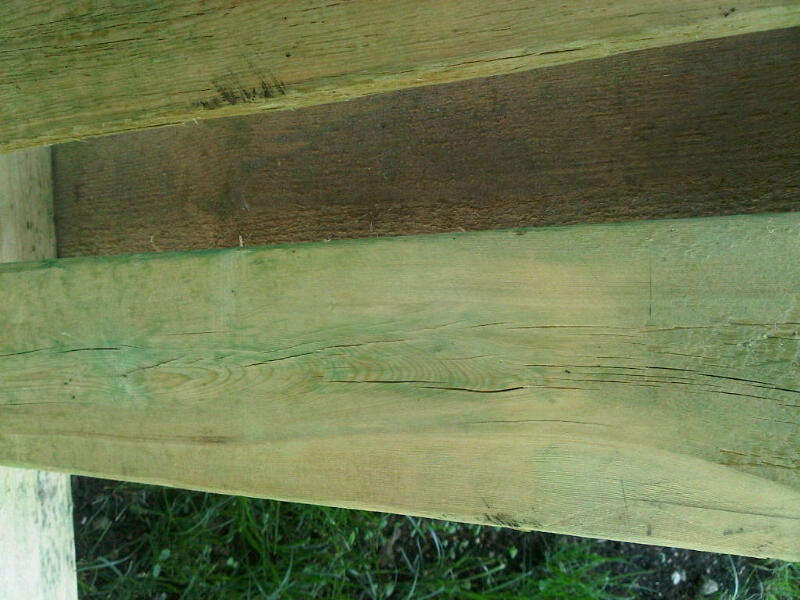
So I stained the herb pallet with the blue copper stain. It did change color and is pretty light. I kinda gave up as I bought some spray paint on sale and decided to use it for the herb pallet, still wanted to post pictures of the results.
I think with the blue stain that it would work better if you kept putting on stain and really brushing it in with the brush, it seemed to take more stain that way. Also I think if you were to sand your wood before staining that it would take the stain more too. I may try on something else yet. Will update if I do.
This is super simple to apply with a brush too.This thread is currently associated with: GuessLast edited by itsmewhoelse; Wed, Jul 3rd, 2013 at 12:25 PM. Reason: add pictures.
The most serious gardening I do would seem very strange to an onlooker, for it involves hours of walking round in circles, apparently doing nothing." --Helen Dillon
-
-
Thu, Jun 27th, 2013, 06:47 AM #2Smart Canuck


- Join Date
- Apr 2013
- Location
- Brampton,ON
- Posts
- 1,668
- Likes Received
- 3143
- Trading Score
- 8 (100%)


Good job... Looks good so far.
-
Fri, Aug 23rd, 2013, 03:49 AM #3Smart Canuck

- Join Date
- Dec 2012
- Location
- Ontario
- Posts
- 4,368
- Likes Received
- 6046
- Trading Score
- 58 (100%)


Wow! who would have thought? I will try too as a project maybe later in the winter. Thank you for sharing.
-
Tue, Aug 27th, 2013, 09:53 PM #4Senior Canuck
- Join Date
- Nov 2009
- Location
- WINNIPEG
- Posts
- 846
- Likes Received
- 502
- Trading Score
- 2 (100%)
I know I was just amazed myself.
The most serious gardening I do would seem very strange to an onlooker, for it involves hours of walking round in circles, apparently doing nothing." --Helen Dillon
-
Thu, Aug 29th, 2013, 10:58 AM #5
I always like homemade products. The smells of store stains are so strong.
Love the photo's of your garden and box!
Might try this on a small project. thanks for sharing
-
Sat, Sep 7th, 2013, 02:24 AM #6
Impressive, I love DIY projects... thank you!
-
Wed, Sep 18th, 2013, 03:05 PM #7
That's a cool idea!
-
Sat, Sep 28th, 2013, 08:49 AM #8
from your efforts now I will prepare wood stain for my new house

-
Wed, Dec 4th, 2013, 04:04 AM #9
Nice job the boxes are really looking stronger for storing lots of things for a long time thanks for sharing and keep it up.
 Send PM


Thread Information
Users Browsing this Thread
There are currently 1 users browsing this thread. (0 members and 1 guests)
