
User Tag List
Results 601 to 615 of 1185
 4190Likes
-
Tue, Aug 13th, 2013, 11:19 AM #601Smart Canuck


- Join Date
- Mar 2012
- Location
- Southern Ontario
- Posts
- 4,706
- Likes Received
- 6138
- Trading Score
- 369 (100%)


That's gorgeous Nicki! Puts my kitchen to shame, that's for sure. I will give you a call when we reno ours, hehehe.
 But it looks great well done - and I don't see any crooked tiles you're goin loopy from working too hard
-
-
Tue, Aug 13th, 2013, 11:20 AM #602One Awesome Domestic Diva


- Join Date
- Apr 2010
- Location
- Ontario
- Posts
- 12,085
- Likes Received
- 20335
- Trading Score
- 88 (100%)


so bored here... (although i have a list of stuff to do) decided to check out pinterest.. y do I do that. LOL. anyway.. i searched 'dollar store crafts'.. i came across this beautiful set of 'hurricane goblets'.. what it is.. two candle holders..and two large tall candle holders glued to the top.. omg so pretty.. i was just about to donate a whole whack of crystal i didn't sell at my garage sale.. not now.. candle holders (for tapers) plus mini crystal coasters (on top of the little holders) plus two large candle holders from the dollar store.. and voila.. im going to have some pretty decorations for cheap.. but worth $$.
Be Strong
Be True
Be You.
Simple as that!
-
Tue, Aug 13th, 2013, 11:22 AM #603Canadian Guru

- Join Date
- Apr 2011
- Location
- Winnipeg
- Posts
- 15,385
- Likes Received
- 24361
- Trading Score
- 513 (100%)
looks beautiful to me - just put a mini flower pot there and no one will notice

 Originally Posted by NickiB

-
Tue, Aug 13th, 2013, 11:23 AM #604One Awesome Domestic Diva
- Join Date
- Apr 2010
- Location
- Ontario
- Posts
- 12,085
- Likes Received
- 20335
- Trading Score
- 88 (100%)
oh..i do believe Nicki has a whole new career in her future..
Be Strong
Be True
Be You.
Simple as that!
-
Tue, Aug 13th, 2013, 11:37 AM #605Riding the Crazy Train!

- Join Date
- Jan 2011
- Location
- St Thomas, On
- Age
- 51
- Posts
- 2,292
- Likes Received
- 4195
- Trading Score
- 272 (100%)
I'm not loopy, I just looked again and it's going to be one of those annoying little things.. every time I walk into the kitchen my eyes will go right there! Wonder if it can remove just the crooked ones and replace them before the adhesive and grout completely cure... hmmm, decisions... Maybe I will take Peachy's suggestion, I've always wanted a couple herb pots in front of the windows, maybe I can strategically place them to cover the crooked tile... Originally Posted by Venuila
It will likely be the last time I use glass tile for sure.. who knew that they almost act like mirrors, so that the sides of the tile reflect everything.. you can't imagine how many times yesterday I thought I missed grout, only to realize once up close it's just a reflection.. and Venuila, anytime I can get a little creative and break out some tools, I'd love to help! I'm pretty comfy with construction and saws, think I've mastered plumbing now.. the only skill I'm a little leary on is the electrical. I did ok in with the bathroom, but when I went to switch the receptacles in the kitchen to those GFI ones.. I realized they are wired a little differently. After 2 hours on google forums, I've determined the only "fix" I read about isn't exactly code, so will likely just return them to the store and suffer with what I have..
If anyone is married to an electrician, I'd love to have some advice! (other than hire an electrician of course.. I'm too cheap for that!)

-
Tue, Aug 13th, 2013, 12:13 PM #606Canadian Genius


- Join Date
- Jun 2011
- Location
- somewhere out there
- Posts
- 5,849
- Likes Received
- 6061
- Trading Score
- 432 (100%)
beautiful kitchen Nicki!!!
-
Tue, Aug 13th, 2013, 12:22 PM #607Frugal is not being cheap

- Join Date
- Jul 2011
- Location
- Manitoba
- Posts
- 6,042
- Likes Received
- 3927
- Trading Score
- 397 (100%)
WOW! Love it! Wish my kitchen looked this nice Originally Posted by NickiB
Looking for some cute or fun handmade gifts? Check out my facebook page
https://www.facebook.com/bowtique.ccs
-
Tue, Aug 13th, 2013, 12:44 PM #608Must Coupon, Must Save :)


- Join Date
- Nov 2012
- Age
- 40
- Posts
- 10,114
- Likes Received
- 42846
- Trading Score
- 64 (100%)

Love the Kitchen Nicki and wow I could never do all that work myself.
-
Tue, Aug 13th, 2013, 12:46 PM #609Riding the Crazy Train!
- Join Date
- Jan 2011
- Location
- St Thomas, On
- Age
- 51
- Posts
- 2,292
- Likes Received
- 4195
- Trading Score
- 272 (100%)
Thanks ladies for the compliments.. it really wasn't a big expense in the realm of kitchen renos.. just a LOT of elbow grease since I was doing it all myself. The kitchen sink I've had for 2yrs, ($75 on sale) bought it and it sat in the box, the glass tiles were on clearance at Home Depot about 1yr ago. ($30 for the box of 10) The countertop kit was likely the most expensive part, $199 at Home Hardware two weeks ago, (not on sale
 ) but I do have an entire can of the product left over in case I ever wanted to do a side table, or something??
I used one can of Para melamine paint on the cabinets, used the cheap style mdf door moldings for the cabinet trim, adhesives, new plumbing, etc.. I think I might have spent just over $500. If I include the floor tile which I did when I painted the cupboards, I bought enough of that for both the bathroom and the kitchen (79c a tile) I think it will put me up to around $700. (A LOT of floor space in my kitchen & dining area!)
Other than my BF hiring his buddy to finish my floor tile under the appliances, and the outer perimeter around a curve, and under the toilet in the bathroom, I did it all myself. It really does feel good to accomplish something. (And p.s.... I think I could have finished the floor tile job better myself!)
-
Tue, Aug 13th, 2013, 12:48 PM #610Canadian Guru
- Join Date
- Apr 2011
- Location
- Winnipeg
- Posts
- 15,385
- Likes Received
- 24361
- Trading Score
- 513 (100%)
buddy buddy buddy I thought of another item that I could use if your not done shopping and it is inexpensive
garage sale stickers - the blank ones - NEED LOTS, I am sure you could find them at the Dollarstore

-
Tue, Aug 13th, 2013, 12:50 PM #611Mastermind


- Join Date
- Jan 2012
- Location
- SOUTHERN ONTARIO
- Posts
- 23,520
- Likes Received
- 31448
- Trading Score
- 551 (100%)
wow ,amazing i love the tiles Originally Posted by NickiB

i don't see anything but beautifulJOIN NOW WIN BIG in the Survivor Pool starting in the Spring
Season 40 Winners At War
https://forum.smartcanucks.ca/435852...a/#post7022499
-
Tue, Aug 13th, 2013, 01:20 PM #612Riding the Crazy Train!
- Join Date
- Jan 2011
- Location
- St Thomas, On
- Age
- 51
- Posts
- 2,292
- Likes Received
- 4195
- Trading Score
- 272 (100%)
Tami I see you!!!
-
Tue, Aug 13th, 2013, 02:29 PM #613Cancer survivor

- Join Date
- Apr 2011
- Location
- WAINWRIGHT,AB
- Posts
- 2,591
- Likes Received
- 12018
- Trading Score
- 134 (100%)
Peeks out. Just drooling over your kitchen Nicki holy cow Hun you are very talented

"Life is not measured by the number of breaths you take, but by the moments that take your breath away"
"because tomorrow is another day"
-
Tue, Aug 13th, 2013, 02:34 PM #614Smart Canuck
- Join Date
- May 2012
- Location
- Edmonton area
- Posts
- 1,371
- Likes Received
- 6903
- Trading Score
- 158 (100%)
Nicki I have been looking at the stone finish for my ugly counter tops, how hard was it to work with? I have been Leary about refinishing but same here I don't want to pay big bucks just to change the look with new tops when these are in good shape just ugly.
You did an awesome job on your kitchen, I love the look of it.
Here are some pictures of my recent renos this past week.
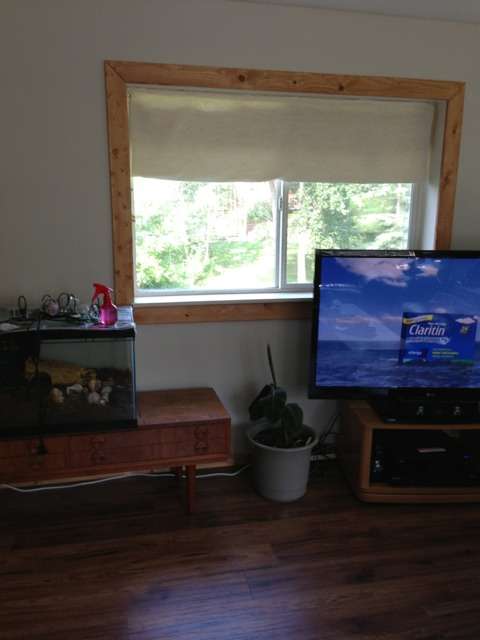
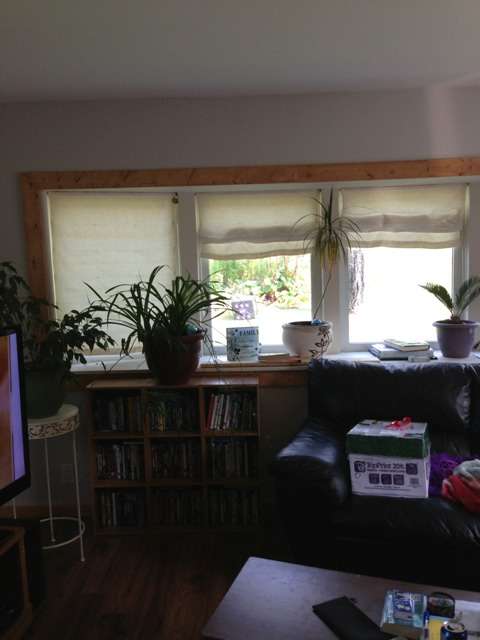
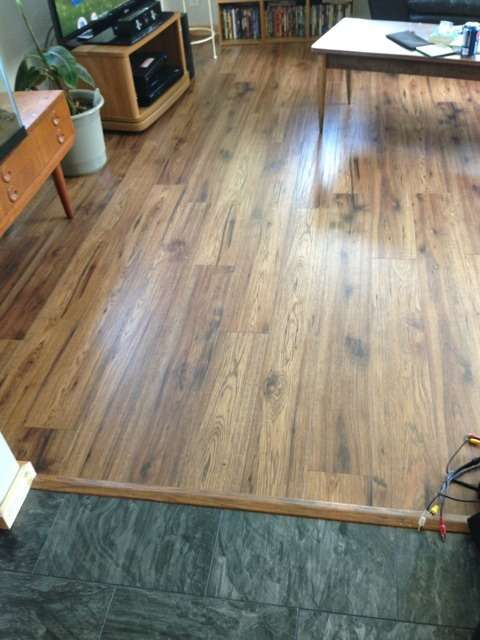
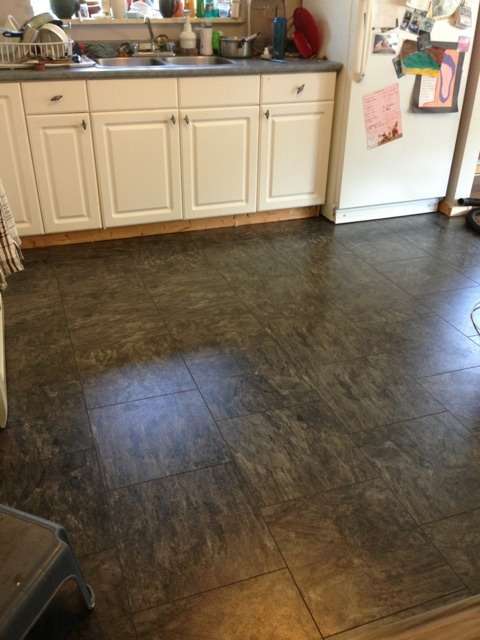
New windows, all new paint, base boards, window trim, and flooring.
Next is to figure out my kitchen counters and cabinets. Then I will see what else I want to change my hubby is starting to regret coming home from work since I keep making a mess and I don't do anything on a table saw, so he has to.
I am also planning on making a new coffee table and a stand for my hermit crabitat.
-
Tue, Aug 13th, 2013, 03:42 PM #615Riding the Crazy Train!
- Join Date
- Jan 2011
- Location
- St Thomas, On
- Age
- 51
- Posts
- 2,292
- Likes Received
- 4195
- Trading Score
- 272 (100%)
Awesome CG Mama.. I sometimes wish I had a table saw, a compound mitre can only do so much! But yeah, I'd likely be a little nervous on that one too! Your reno's look awesome, doesn't it feel good to have something all clean and new?
The countertop kit I went with was the Home Hardware Beautitone refinishing kit. Supposed to look like granite, but I think that's a stretch. Other than it not looking exactly as I'd hoped, it wasn't too difficult to work with. You have to sand/scuff it up, use two coats of their primer, two coats of the finish coat, and then two of the sealer. I have two complaints.. they suggested doing thin coats, so in all honesty, I think it should have been 3. Especially for me, trying to go to a black counter from a light pink. Second complaint is that the stone flecks are really hard to spread evenly. It looks pretty much just like paint, and you can't really see the stones until it's dry and you sand.. in my case I was using black paint at like 9pm at night, so it was hard to see if the texture was evenly spread. So, basically, I have some areas with more "stone fleck" than others... If I'd just done the third coat (I have one whole can left!) it likely would have been more even, plus, given me a little grace with the sanding, I didn't want to go too far in case I hit the primer, so in my case, the surface could have been a bit smoother.
I looked at the Rustoleum kit as well, but it was $299 for the kit, and came with a shiny fleck spreader..(like a hand held grass seed spreader) but not knowing how either would turn out, I didn't want to spend the extra $100. I think the colouring would have been better on the more expensive kit, but yeah, $100 goes a long way.
From the very limited reviews I could find on this, I think the lighter colours look more realistic, but I can take a close up of mine in the black if you'd like to see..
It's been on a week so far, and just light use, I have to remember to use a cutting board, hot pads etc., but it seems to be pretty tough. After all, I have been up on the counter running my butt back and forth for the tiling, and it seems to have held up!
Good luck, let me know if you have questions, and I'd love to see more of your photos!

 Send PM

Thread Information
Users Browsing this Thread
There are currently 1 users browsing this thread. (0 members and 1 guests)
