
User Tag List
Results 46 to 60 of 344
 651Likes
Thread: Money saving tips and tricks
-
Sat, Jan 19th, 2013, 10:37 AM #46Smart Canuck



- Join Date
- Jan 2011
- Location
- Under the Tuscan Sun - lol, I wish !
- Posts
- 3,993
- Likes Received
- 2049
- Trading Score
- 450 (100%)


This works beautifully. I made muffins the other day and sprayed the paper liners before filling them and they peel off the muffins so easily. Originally Posted by Anna Michele

I haven't bought Pam or any other cooking spray in years.Trade List /Wishlist: http://forum.smartcanucks.ca/382792-dreamcatcher1962s-trade-wish-lists-canada/#post5928904
-
-
Sat, Jan 19th, 2013, 03:56 PM #47Must Coupon, Must Save :)


- Join Date
- Nov 2012
- Age
- 42
- Posts
- 11,340
- Likes Received
- 46658
- Trading Score
- 64 (100%)


Instead of using the dishwasher or machine machine cleaners is a 1/4 cup of vinegar instead. Run a full cycle using only 1/4 cup of vinegar it will clean any gunk and build up out and no your clothes do not smell of vinegar. Many thought I was insane to try this on my washing machine assuming all my clothes would come out smell on vinegar, they did not and actually I find my clothes came out cleaner. Trust me I checked to make sure I could not smell any vinegar.
**Note when doing this in the washer I do use the hot cycle. I have never tried it on the cold cycle which is what we normally use for all out washing
-
Sat, Jan 19th, 2013, 07:20 PM #48Mastermind


- Join Date
- Jan 2012
- Location
- SOUTHERN ONTARIO
- Posts
- 23,678
- Likes Received
- 31550
- Trading Score
- 551 (100%)
homemade air freshener
"Don't you get fresh with me, ya hear!"
Oh, I love it when adults (especially grandparents) say that to little kids. What does it mean exactly? Does it mean we'd rather children get dirty with us? Haha...who knows?
Today, I'm going to ask you to actually get fresh with me. This kitchen craft project is too fun and too easy not to try. I really wish I had discovered it earlier in life...like when I was a Resident Assistant in college and wasn't allowed to have candles...or all of those times when I haven't had the money to go on a shopping spree at Yankee Candle.
I digress. Let me just say...you'll love this.

I was roaming around on Tasty Kitchen one day when I came across a recipe for homemade air freshener. This intrigued me! I love candles, but as we all know, you can't leave them burning unattended. And there are some rooms in my home where I want a constant, unattended scent (ahem, the bathroom). These gel air fresheners are the perfect solution.
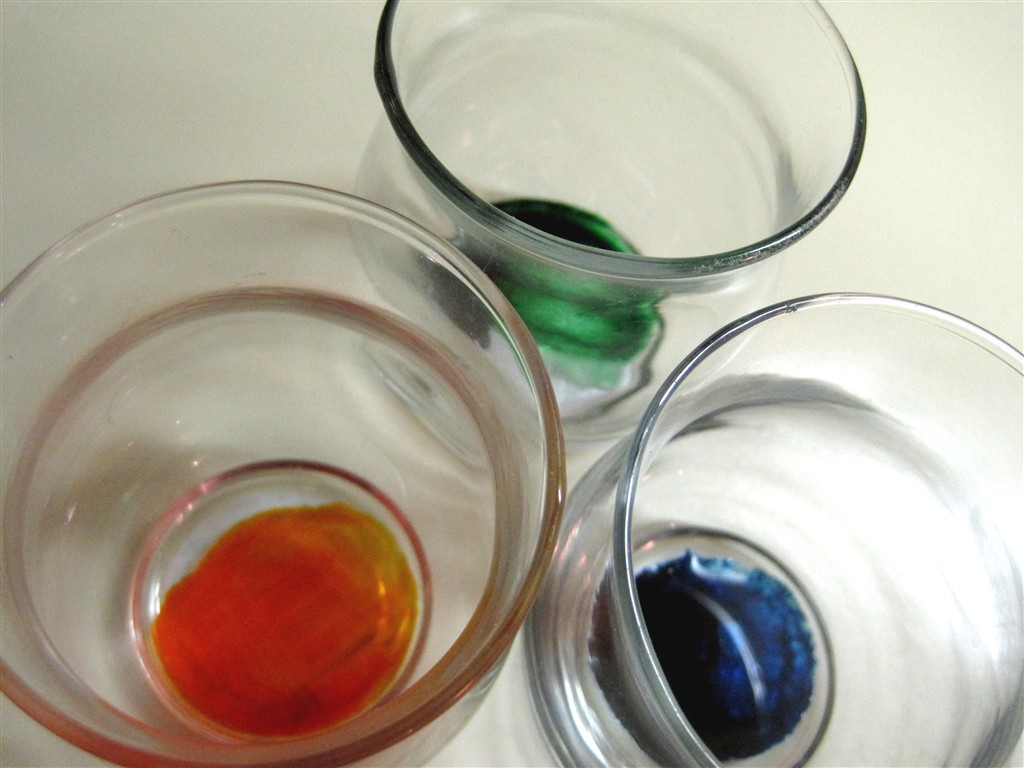
To make these little beauties, you first need a heat-proof jars (I found mine for $0.99 each at Michael's), food coloring colors of your choice, and essential oil. You can find inexpensive essential oils of various scents at craft stores like Michael's and Hobby Lobby. I chose a raspberry vanilla scented oil...it smells delightful!

Into each jar, drop a few drops (I repeat...a few...it doesn't take more than 2 or 3) of food coloring. Then, put in about 30 drops of essential oil, give or take. The more essential oil you put in, the stronger the smell.

Now for the fun part. Gather up 4 envelopes of unflavored gelatin, a tablespoon of salt, and 2 cups of cold water.
Why salt? Salt (or vodka) apparently help to keep the gel from molding. Interesting fact, isn't it!

Get one cup of water boiling on the stove. When it begins to boil, whisk in the gelatin, stirring until it's all dissolved.

Then, pour in the other cup of cold water and the salt, stirring until the salt is dissolved.

Quickly pour the hot gelatin mixture in each of your jars, and then use a disposable stick or spoon to stir it into the oil and food coloring.

Let these gel overnight, and then voila! Air freshener!

This project takes a total of five minutes to make, is highly economical, and each jar should last you about a month. This would make a great back-to-school gift for any teacher!
http://www.delightfulcountrycookin.c...freshener.htmlJOIN NOW WIN BIG in the Survivor Pool starting in the Spring
Season 40 Winners At War
https://forum.smartcanucks.ca/435852...a/#post7022499
-
Mon, Jan 21st, 2013, 11:12 AM #49Mastermind
- Join Date
- Jan 2012
- Location
- SOUTHERN ONTARIO
- Posts
- 23,678
- Likes Received
- 31550
- Trading Score
- 551 (100%)
http://ecosalon.com/20-unusual-uses-...olive-oil-395/
20 Unusual Uses for Olive Oil
by Stephanie Rogers on November 16, 2011 in Food

Olive oil glides into place as a must-have household and beauty product.
Life without olive oil would be sad indeed. Since antiquity, this miracle substance has been revered for its wonderfully fruity flavor, but it’s so much more than a healthy topping for salad and a heavenly dip for fresh-baked bread. Olive oil has dozens of unusual uses around the house, not to mention its powerful moisturizing and healing properties on the hair and skin. Check out 20 reasons why you should never be caught without it.
Paint clean-up
When your hands are covered in paint, sap or any other sticky substance that’s hard to remove, try scrubbing them with olive oil and a little salt or sugar. The paint will come right off and your skin will be soft and exfoliated.
Eye makeup remover
Even the heaviest, drag-show-worthy makeup job can’t stand up to the removal power of olive oil. Dab a little on a cotton pad and your eyeshadow, eyeliner and mascara – including waterproof formulas – will wipe right off.
Furniture polish
Olive oil helps remove dust from furniture and gives it a shine. Add a teaspoon to a quarter cup of lemon juice, and you’ve got a non-toxic, petroleum-free polish that also gently cleans wood surfaces.
Skin moisturizer
You might think using olive oil as a moisturizer would leave you with oily skin, but that’s not the case. Used in small amounts, it seeps in completely, eliminating dryness and reducing the appearance of wrinkles without clogging pores.
Shoe polish
What, exactly, is it in shoe polish that has such a headache-inducing smell? It could be any number of potentially toxic ingredients. Banish them from your house and use olive oil instead. Just buff onto your leather shoes with a cloth.

Hinge lubricant
WD-40 shouldn’t hold a monopoly on squeaky door hinges when simple, natural olive oil works just as well. Wipe it on with a cotton ball or use a spray bottle to lubricate the hinge and eliminate that annoying creak.
Bath oil
Add a few drops of your favorite essential oils to 3-4 tablespoons of olive oil and you’ve got a custom bath oil that will gently scent and moisturize your skin.
Stainless steel shine
Olive oil alone will buff stainless steel and brass surfaces to a brilliant shine. Just wipe off any debris and allow the surfaces to dry completely, then pour a little oil onto a clean, soft cloth. Buff in circular motions with firm pressure.
Smooth shave
Slick and moisturizing, olive oil will help your razor glide along your skin for a super-close, smooth shave with fewer nicks.
Throat soother
Got a big singing performance or speech coming up? Swallow a tablespoon of olive oil just before you step on stage and you won’t have to clear your throat nearly as often. This trick also works to soothe itchy throats and lubricate the back of the mouth and tonsil area, which may lessen snoring.

Hair treatment
Sure, you could buy a fancy commercially-prepared hot oil treatment for your hair – or you could just grab the bottle of olive oil that’s already sitting on a shelf in your kitchen. Apply a few tablespoons of warmed olive oil to damp hair, massage into the scalp and rub through the ends, then leave it on for thirty minutes to an hour. The oil will clean and condition the scalp, soften the hair and help the cuticles lay down flat for a sleek look.
Ear ache relief
A little warm olive oil is a fast, effective means of relieving painful ear aches. Just place the bottle in a bowl of warm water for a few minutes, then pour a few drops into the affected ear. To cure ear infections, infuse the olive oil with a crushed clove of garlic, strain the garlic out and drip into the ear.
Sticker remover
Dab olive oil onto a sticker or label, let it sit for a few minutes and the sticker will peel right off. No scraping needed, no annoying residue left behind.
Lice treatment
Olive oil has long been a preferred natural treatment to eliminate dreaded head lice. It reportedly helps to dissolve the exoskeleton of these little parasites, and smother the ones that are resistant. Pour it on to dry hair liberally, comb out any visible lice with a nit comb and then leave it on under a shower cap for up to 8 hours. Follow by coating the hair in apple cider vinegar; leave it on overnight, shampoo as usual and then comb out any remaining eggs.
Hairball prevention
Nobody likes the sound of a cat loudly hacking up a hairball, especially since it always seems to happen when you’re trying to eat or sleep. Help it pass through your cat’s system more easily by adding 1/4 teaspoon of olive oil to his or her food each day.

Lamp fuel
A blizzard just hit, the power’s out and you realized that you’re out of batteries and candles. Do you just sit around in the dark? No, you grab that bottle of olive oil – because by now you should know that it’s an absolute essential in your life – and use it to fuel a lamp. You can purchase specially made olive oil lamps, or simply pour it into a glass jar, poke a hole into the jar lid and insert an oil lamp wick.
Chewing gum remover
Whether your child comes home from school with a mass of sticky pink bubble gum in her hair or you find yourself the victim of a wayward wad, you don’t have to resort to any crazy tricks or – gasp – scissors to get it out. Apply olive oil to the gum and the surrounding hair, leave it on for five to ten minutes and then pull the gum out.
Leather conditioner
Just as it cleans and restores leather shoes, olive oil can be used to re-condition cracked, dry leather items like baseball gloves, car seats and saddles. It takes a bit longer to fully penetrate the leather than most conventional conditioners, but it works.
Psoriasis and diaper rash treatment
Olive oil soothes itchy, burning, irritated skin and may help rashes heal. Apply it to a baby’s diaper rash or directly to any eruptions on your own skin for quick relief. Consuming olive oil on a regular basis may also be helpful in the treatment of mild to moderate psoriasis.
Personal lubricant
Squeaky hinges aren’t the only parts that work better when lubricated. But just because you’re in the mood for some slippery fun doesn’t mean you should grab a tube of KY. There are lots of safe, natural alternatives to potentially toxic personal lubricants, but plain old olive oil will do the trick nicely – just avoid using it with latex condoms.JOIN NOW WIN BIG in the Survivor Pool starting in the Spring
Season 40 Winners At War
https://forum.smartcanucks.ca/435852...a/#post7022499
-
Mon, Jan 21st, 2013, 11:23 AM #50Mastermind
- Join Date
- Jan 2012
- Location
- SOUTHERN ONTARIO
- Posts
- 23,678
- Likes Received
- 31550
- Trading Score
- 551 (100%)

5 Anti Aging Recipes serum, cleansers and cream
Honey and Fruit Age Defying Face Mask
1 tsp of Honey
A few drops of Orange Juice.
Mix the two together well and spread mixture over entire face even around the eyes and mouth.
Leave it on for 20 minutes then remove with lots of warm water and a face cloth.
Surely it doesn’t get any simpler than this? Products I always have in my fridge and no need to store or carefully blend anything. Definitely a winner…if it works!
Nourishing Facial Serum Recipe
2 tbsp Jojoba oil
1 1/2 tsp Evening Primrose oil
5 drops Neroli essential oil
8 drops Geranium essential oil
8 drops Frankincense essential oil
8 drops Carrot Seed essential oil
Combine the ingredients in a dark glass bottle with a dropper. Shake for 2 minutes. Use only 1 or 2 drops of serum for the entire face and throat area.
The ingredients for this one aren’t cheap but will form (in addition to the lavender, tea tree and rose essential oils I always have on hand) my basic essential oils collection which I can make basic products from and keep adding to.
Anti Aging Restorative Eye Serum
2 tbsp Jojoba oil
5 drops Chamomile essential oil
5 drops Rose essential oil
Combine essential oils with Jojoba oil and store in a one-ounce glass bottle with a dropper top.
Apply 1 drop of the oil to your finger and gently smooth the oil beneath your eye and onto the area just beneath the brow bone. Do not apply oil directly to your eyelids.
I’m keen to see if this works to reduce the fine lines that I’m sure have developed as a direct result of so many sleepless nights.
Lavender Rose Face Cleanser Recipe
6 tbsp Grape Seed oil
10 drops of Lavender essential oil
5 drops of Geranium essential oils
5 drops of Rose essential oils
1 tbsp Brown Sugar (optional to make a facial scrub)
Add carrier oils to a clean, dark glass bottle. Add essential oils. Gently shake to blend before each use. Store in a dark, glass bottle in a cool place. Apply a small amount to face and massage to cleanse. Rinse with warm water and a face cloth. Add the brown sugar to hands, right before you are going to wash if you want a facial scrub instead.
I already have the rose and lavender essential oils in the cupboard for this cleanser recipe and it doubles as a facial scrub – a bargain!
Rose Cream Recipe
4 tbsp Apricot Kernel Oil
4 drops Rose essential oil
14g Beeswax
Slowly heat the almond oil, beeswax and rose oil in a double boiler. Stir to mix. If the cream is not thick enough, add more beeswax. If it’s too thin, add more oil.JOIN NOW WIN BIG in the Survivor Pool starting in the Spring
Season 40 Winners At War
https://forum.smartcanucks.ca/435852...a/#post7022499
-
Mon, Jan 21st, 2013, 11:24 AM #51Mastermind
- Join Date
- Jan 2012
- Location
- SOUTHERN ONTARIO
- Posts
- 23,678
- Likes Received
- 31550
- Trading Score
- 551 (100%)

Homemade Deodorant Recipe using Coconut Oil
Ingredients:
1/3 cup coconut oil
1/4 cup baking soda
1/4 cup arrowroot powder
4 tablespoons cornstarch (this will add an antiperspirant effect to the deodorant.)
essential oils (optional, but you could use tea tree oil, sweet orange, cinnamon, etc.)
.How to make:
Mix baking soda, cornstarch, and arrowroot powder in a bowl.
Add coconut oil and use a fork or pastry cutter to blend into the dry ingredients.
Add 5-10 drops of your chosen essential oil (I used tea tree oil).
Add more coconut oil or baking soda to achieve your desired consistency.
Viola! Now you have easy-peasy, good-for-you, all-natural deodorant!
Other Notes:
This recipe uses coconut oil which will liquefy at 76 degrees (it will remain solid at any temp under 76 degrees) but in summer my hubby doesnt care he just takes a little on his finger and rubs his pits with it LOL :D
I’ve heard of people putting their homemade deodorants in cleaned-out store-bought deodorant containers but it didn’t work for me. My DIY deodorant leaked out the bottom of the container and was a gooey mess.
Instead, I store this coconut oil deodorant in a small glass jar and I keep it in my medicine cabinet.
To apply, I take a small amount and rub it together with my hands to soften and then rub it into my underarms like a lotion.
Me and my husband both use this deodorant and absolutely love it. We’d never switch back to store-bought. You really must give it a try.JOIN NOW WIN BIG in the Survivor Pool starting in the Spring
Season 40 Winners At War
https://forum.smartcanucks.ca/435852...a/#post7022499
-
Mon, Jan 21st, 2013, 11:25 AM #52Mastermind
- Join Date
- Jan 2012
- Location
- SOUTHERN ONTARIO
- Posts
- 23,678
- Likes Received
- 31550
- Trading Score
- 551 (100%)

The materials you will need are:
Soy wax flakes. These are commonly used in making scented candles and are sold in craft stores or Amazon. I bought a 5 pound bag from Amazon for 12.79 shipped - . A pound of wax will fill around a 24 ounce container, give or take. You can use other wax, but soy is affordable, typically has a longer burn time than other waxes and has some other beneficial qualities (all-natural, renewable, etc.).
Canning jars. I purchased a dozen 8 ounce jars from grocery store for around $8. If you have jars around the house, no need to buy 'em. We've used jars from jams, sauces and so on for candles in the past.
Wicks and Tabs. You can find these on Amazon, and at your craft stores. You'll want your wicks to be a bit longer than your candle holder is tall. I have 100 tabs and 100 nine inch wicks on Amazon for about $10 total.
The tools you will need are:
Scissors: For cutting the wicks to size
Double Boiler: For melting the wax. I don't have an actual double boiler, so I just get a large pot, fill it about 1/3 to 1/2 of the way with water, and then nest a slightly smaller pot inside.
A Pouring Device: I just used a pyrex measuring cup.
Protective Gloves: We'll be using boiling water and hot wax, so you want to keep you hands safe.
The steps are simple.
First, you'll want to get your wicks ready. If your wicks are way too long for your container, you'll want to trim them down to approximate size. I had 9" wicks here. Insert the wick into the tab - I found it helpful to use my Leathman to "tighten" the mouth of the tab around the wick, but it's not a must. If you buy pre-tabbed wicks then you can skip this part.
Put your wicks in the jars. Don't worry if they're not centered - we'll fix that after we pour the wax. Now it's meltin' time!
Using a double boiler helps melt the wax gently, avoiding risk of it catching fire, burning, etc. You could probably do it without, but it's not hard to improvise so why not?
Carefully transfer the melted wax into your pouring container. Then, pour away! Don't worry about the container - soy wax is all natural, non-toxic and cleans up fairly easily. Beware if you have a soy allergy, though.
Don't fill the jar up the whole way - leave some room between the wax and the top of the container. You'll want to center the wicks at this point. Then, take a break and let the wax cool and harden up. Almost done!
Last step. After the wax has cooled, trim the wicks as needed--you want the wick to be about 1/4" above the wax. Then, screw the lids on and you're ready for storage!
While some advertise 70+ hours of burn time for 8 ounce candles like this, they're more in the ballpark of 40 to 50 hours, and you'll get the most life out of them if you burn the candles four hours at a time. Since you would only use the candle for about 4 hours every evening, a single candle should last for around 10 days of regular use. Not bad! You can of course use different sized jars--bigger for longer burn time, or multiple wicks for more light.
Including the purchase of new jars, my cost per candle is around $1.62. With recycled jars, it's under a dollar.
These aren't crap materials, either--these are the same quality of materials use for high-end aromatherapy candles that sell for $20 a pop. Another plus - the combination of soy wax's lower melting point and the protective glass jar make this a safer source of light when compared to other candles, oil lanterns and so on.
One modification that I plan to make it to include a booklet of matches inside of each jar - cheap and makes sure you've got a way to light the candle if it's pulled out of storage during a power outage, etc.JOIN NOW WIN BIG in the Survivor Pool starting in the Spring
Season 40 Winners At War
https://forum.smartcanucks.ca/435852...a/#post7022499
-
Mon, Jan 21st, 2013, 11:28 AM #53Mastermind
- Join Date
- Jan 2012
- Location
- SOUTHERN ONTARIO
- Posts
- 23,678
- Likes Received
- 31550
- Trading Score
- 551 (100%)
Calming Cucumber Coconut Milk Toner

Suitable for dry/normal skin.
8 slices peeled cucumber
1/4 cup milk
1/4 cup coconut water
Mix all of the ingredients in a blender until the mixture is smooth with no texture.
Apply to skin with a cotton ball, let dry and then rinse off with water.
Refrigerate in a bottle or jar and use daily.JOIN NOW WIN BIG in the Survivor Pool starting in the Spring
Season 40 Winners At War
https://forum.smartcanucks.ca/435852...a/#post7022499
-
Mon, Jan 21st, 2013, 11:28 AM #54Mastermind
- Join Date
- Jan 2012
- Location
- SOUTHERN ONTARIO
- Posts
- 23,678
- Likes Received
- 31550
- Trading Score
- 551 (100%)

Moisturizing Apple Pear Mint Cleanser
Suitable for dry/normal skin.
1/4 cup yogurt
5 thin slices of pear
5 thin slices of apple
5 thin slices of cucumber
1 teaspoon dried mint
Drizzle of honey
Mix all of the ingredients in a blender until the mixture is smooth and thin. The yogurt and the juice for the fruit and cucumber will increase the thinness of the mixture.
Cleanse face and neck, rinse completely.
Refrigerate in a bottle or jar and use dailyJOIN NOW WIN BIG in the Survivor Pool starting in the Spring
Season 40 Winners At War
https://forum.smartcanucks.ca/435852...a/#post7022499
-
Mon, Jan 21st, 2013, 11:29 AM #55Mastermind
- Join Date
- Jan 2012
- Location
- SOUTHERN ONTARIO
- Posts
- 23,678
- Likes Received
- 31550
- Trading Score
- 551 (100%)

Tightening Green Tea and Grapefruit Toner
Suitable for oily/combination skin.
2 green tea bags steeped in 1 cup water and cooled.
1/4 cup witch hazel
Juice of 1/2 of a red grapefruit
Steep the tea bags in the water and let cool.
Remove the teabags.
Add the witch hazel and the grapefruit juice to the tea water.
Mix all together.
Apply to skin with a cotton ball, let dry and then rinse off with water.
Refrigerate in a bottle or jar and use dailyJOIN NOW WIN BIG in the Survivor Pool starting in the Spring
Season 40 Winners At War
https://forum.smartcanucks.ca/435852...a/#post7022499
-
Mon, Jan 21st, 2013, 11:29 AM #56Mastermind
- Join Date
- Jan 2012
- Location
- SOUTHERN ONTARIO
- Posts
- 23,678
- Likes Received
- 31550
- Trading Score
- 551 (100%)

Invigorating Lime Honey Scrub-Cleanser
Suitable for oily/combination skin.
1/3 Cup rolled oats
1/3 Cup unsalted nuts ( almonds, hazelnuts, etc )
Grind the oats and nuts together using either a food processor or an immersion wand blender until they are a fine powdery consistency. This will give some abrasion to the cleanser to help exfoliate.
Add the following ingredients to the oat/nut mixture and blend.
1 tablespoon grapeseed oil
1 tablespoon honey
1/4 cup milk
Juice of 1/2 of a lime
Add in more milk until the mixture has a thin consistency.
Cleanse face and neck, rinse completely.
Refrigerate in a bottle or jar and use dailyJOIN NOW WIN BIG in the Survivor Pool starting in the Spring
Season 40 Winners At War
https://forum.smartcanucks.ca/435852...a/#post7022499
-
Mon, Jan 21st, 2013, 11:31 AM #57Mastermind
- Join Date
- Jan 2012
- Location
- SOUTHERN ONTARIO
- Posts
- 23,678
- Likes Received
- 31550
- Trading Score
- 551 (100%)

Alcohol-Free Homemade Hand Sanitizer Fight Flu Season
Start with a recycled hand sanitizer bottle or liquid soap bottle
Fill it 2/3 of the way with water
Add 1 Tablespoon of aloe vera gel
10 drops each of the following oils: lemon, cinnamon, eucalyptus and clove bud.
Top off the bottle with water and shake it up. Spray onto hands (3-5 sprays) and massage the spray into hands for 5-10 seconds.JOIN NOW WIN BIG in the Survivor Pool starting in the Spring
Season 40 Winners At War
https://forum.smartcanucks.ca/435852...a/#post7022499
-
Mon, Jan 21st, 2013, 11:32 AM #58Mastermind
- Join Date
- Jan 2012
- Location
- SOUTHERN ONTARIO
- Posts
- 23,678
- Likes Received
- 31550
- Trading Score
- 551 (100%)
How to Treat Migraines with an Herbal Tincture at Home
 Lemon balm (Melissa officinalis) abounds in my garden!
It is one of the most easy to grow medicinal herbs and has some pretty amazing healing properties…making it a great addition to the home pharmacy.
Historically, lemon balm has been used to treat all kinds of nervous system ailments and is known for it’s ability to:
calm an irritable child.
act as an antiviral in treating cold sores due to the herpes virus.
heal wounds and protect the skin.
treat the symptoms of the common cold and flu when combined with other medicinal herbs.
relieve the symptoms of migraine headaches, anxiety, depression, and insomnia.
Likewise, feverfew is unbeatable when it comes to treating the common headache, migraines, stress/tension headaches, and those headaches associated with PMS symptoms. It truly is a wonder herb and a must in the garden of those who suffer these ailments.
Supplies needed
-Solvent (i.e. 100 proof alcohol or vegetable glycerin)
-quart sized glass mason jar
-4 oz. fresh or 2 oz. of dried herbs
Ingredients
-3 parts lemon balm
-2 parts feverfew
-100 proof vodka to fill
Method
. Measure your herbs depending on whether you are using fresh or dried herbs.
2. If using fresh herbs, chop until fine.
3. Add herbs to glass jar.
4. Pour solvent over herbs to fill the jar. The solvent should rise 1-2 inches above the herbs.
5. Place the lid on the jar and shake until the herbs are well combined.
6. Label jar with contents and date.
7. Set in a warm, sunny window and steep for 2-6 weeks, shaking daily.
8. Strain with a cheesecloth, compost the plant material, and place tincture in dark colored bottles for storage in a cool, dark place. The tincture should keep for up to 5 years.
Adult Dosage
At the sudden onset of migraine symptoms, begin taking 1/4-1/2 a teaspoon of the tincture every 30 minutes to an hour until symptoms subside.JOIN NOW WIN BIG in the Survivor Pool starting in the Spring
Season 40 Winners At War
https://forum.smartcanucks.ca/435852...a/#post7022499
-
Mon, Jan 21st, 2013, 11:39 AM #59Mastermind
- Join Date
- Jan 2012
- Location
- SOUTHERN ONTARIO
- Posts
- 23,678
- Likes Received
- 31550
- Trading Score
- 551 (100%)

all natural cleaning wipes: 1. Cut up some old T-shirts. Use something knit because it won't fray when you wash it. 2. Put the cut up shirt rectangles into an old wipes container (or any container that works for you). 3. Add about 2 Tbs of Dr. Bronner's soap and about 1 cup of water (just until shirts are moistened). 4. Pull one out and clean away! 5. Wash the dirty wipes and reuse!
http://www.drbronner.com/
hmmmm not sure abouthe dr. bronners as i don't think there's a coupon for it lol
here are some other alternatives I found
General Surface Cleaning Recipe:- 1 1/2 cups white vinegar
- 1 1/2 cups water
Disinfectant Cleaning:- 1/4 to 1/2 cup pine cleaning solution such as Pine-Sol brand
- 2 1/2 to 2 3/4 cup water
Window and Glass Cleaning:- 1/2 cup rubbing (isopropyl) alcohol
- 2 1/2 cups water
- 1 tablespoon white vinegar
http://organizedhome.com/clean-house...cleaning-wipes
OR
Baby Wipes
1 roll bounty paper towels
2 tablespoons baby bath soap
1 tablespoon baby oil
2 cups water
After Bath Wipes
1 roll bounty paper towels
3 tablespoons baby oil
2 cups water
Multi-Purpose Wipes
1 roll bounty paper towels
1/4 cup multi-purpose cleaner
2 cups water
Car Cleaner Wipes
1 roll bounty paper towels
1/4 cup armour all cleaner
2 cups water
Directions:
1
Cut the roll of towels in half with a sharp knife.
2
In a plastic container, mix the liquid ingredients very well.
3
Add 1/2 of the paper towels, place lid on container and let sit for 10-15 minutes.
4
Turn container over and let sit for another 10-15 minutes.
5
When all the ingredients have absorbed, pull the brown paper out of the middle and then you can pull the wipes through the center.
http://www.food.com/recipe/homemade-wipes-81091JOIN NOW WIN BIG in the Survivor Pool starting in the Spring
Season 40 Winners At War
https://forum.smartcanucks.ca/435852...a/#post7022499
-
Mon, Jan 21st, 2013, 11:42 AM #60Mastermind
- Join Date
- Jan 2012
- Location
- SOUTHERN ONTARIO
- Posts
- 23,678
- Likes Received
- 31550
- Trading Score
- 551 (100%)

great idea for hiking or travelling
DIY - Single Use Antibiotic Packs
We're going to make very small, single use packets of antibiotic ointment ....you can use your own salves instead also
need-
a lighter
clean drinking straws
ointment
needle nose pliers
Place the straw over the opening of the ointment tube and carefully squeeze in a small amount of the ointment that is approximately one quarter of an inch in length. You'll notice that transparent straws work best for this.
Use you fingers to squeeze the end of the straw so that it pushes the ointment further up inside the plastic straw. This will provide a clean area for sealing the end of the straw without having the ointment ooze out while you are holding it with your pliers.
Hold the end of the straw with your needle-nose pliers so that a small amount of the straw is protruding. This will be used to melt and seal the end of the straw. Take your Bic lighter and carefully melt the end of the straw so that it forms a seal. I like to quickly pinch the melted end with my pliers to ensure a good seal.
Turn the straw around and find the point where the ointment went up to inside the straw. Pinch just past that with your needle-nose pliers and cut off the excess straw with a pair of scissors making sure to leave a small amount of the straw protruding for sealing with your lighter just as you did in the first step.
Now you have a single use packet of antibiotic ointment that you can carry with you as part of your UL backpacking first aid kit. These are also perfect for EDC carry in a pocket or even your wallet.JOIN NOW WIN BIG in the Survivor Pool starting in the Spring
Season 40 Winners At War
https://forum.smartcanucks.ca/435852...a/#post7022499

 Send PM




Thread Information
Users Browsing this Thread
There are currently 1 users browsing this thread. (0 members and 1 guests)
